Staying Strong in Retirement
Retirement planning exposes some cruel ironies of life. Most young people have an abundance of time and health in their school/training years, but little money to take advantage of these non-financial assets.
Most of us enter our adult years with our health as we shift our focus to careers and family during our peak earning years. Time becomes our scarce resource.
After decades of earning, saving, investing and planning we finally have the financial strength to buy back our time and use it as we want in retirement. But as we age, health is not a given. In fact, tens of thousands of people retire each year not because they want to, but because they’re physically unable to work.
The biggest advantage of saving and planning for early retirement is giving ourselves a better chance of having time and money while we still have good health to enjoy it.
But physiological changes occur as we age. We need to invest in our health.
There are no guarantees in life, but improving diet, exercise, sleep and controlling stress while building the financial resources to retire sooner all help stack the odds in your favor.
Last month, I shared my experiences from my career as a physical therapist to provide insights along with specific exercises to maintain and improve posture and mobility. Today, we’ll explore concepts and specific exercises you need to maintain and even increase physical strength as you age, helping you to live to your full potential in retirement.
Misconceptions About Strengthening
It’s important to start by addressing some misconceptions people have about physical strength and aging.
The first misconception is that muscle atrophy and progressive weakness are natural and inevitable parts of the aging process. There is an element of truth to this. Sarcopenia, age related muscle loss, and neuromuscular degeneration are both natural parts of the aging process. However, there is strong peer-reviewed evidence that both males and females can make statistically and functionally significant strength gains into their seventies, eighties and even their nineties!
Another misconception is confusing being strong with looking like a bodybuilder. Many people who appear strong because they focus on their “beach muscles” have substantial weakness and muscle imbalances that limit function and predispose them to injury.
As a physical therapist, I’ve treated people who look like they could bench press a car but can not do simple exercises that involve lifting the weight of their arms against gravity. I’ve seen marathon runners with hips so weak they can’t do the simple exercises that require you to lift the weight of your leg.
Finally, there is a misconception that getting strong requires expensive equipment or a gym membership. I don’t have a gym membership. My home gym consists of a couple resistive bands, a theraball, a pull-up bar, and a kettlebell weight. Most people won’t need the latter two.
The exercises I will share form a solid foundation for a strengthening program. They’ll keep you strong and active with less risk of injury into the later years of your retirement. I’ll also share tips to incorporate these movements in a practical way.
Standard Disclaimers
I take my duty seriously to first do no harm. Therefore please read the following two paragraphs carefully before attempting any of the exercises.
These strengthening exercises address the most common areas of weakness and provide maximal functional benefits to maintain and improve strength and prevent injury as you age. They are intended for people who are in good physical health and able to perform the movements without pain.
If you are unable to perform any movement without pain, stop and seek help from a physical therapist. If you have any pre-existing injuries or medical conditions or do not have regular medical examinations, it is vital that you talk with your medical doctor before starting any exercise program.
Core Strength
Core strength is a phrase commonly thrown around in discussions of exercise and fitness. Despite how frequently the phrase is used, most people don’t understand what it means or how to improve it.
When thinking about core strength, start with the idea of proximal stability for distal mobility. This means we want a stable base to support extremity (arm and leg) movements. Core muscles that allow this include the abdominals (including the transverse and oblique abdominals), back extensors, neck flexors, scapula stabilizers (muscles that control movement of the shoulder blades), rotator cuff muscles of the shoulder, and hip musculature.
Trunk Strength
Here are a few key trunk strengthening exercises that provide a strong base upon which the other exercises will build.
Abdominal Bracing
Abdominal bracing is most easily learned when lying on your back. Bend your knees so the bottoms of your feet rest on the floor. Tense your abdominal muscles and draw them in slightly while breathing normally.
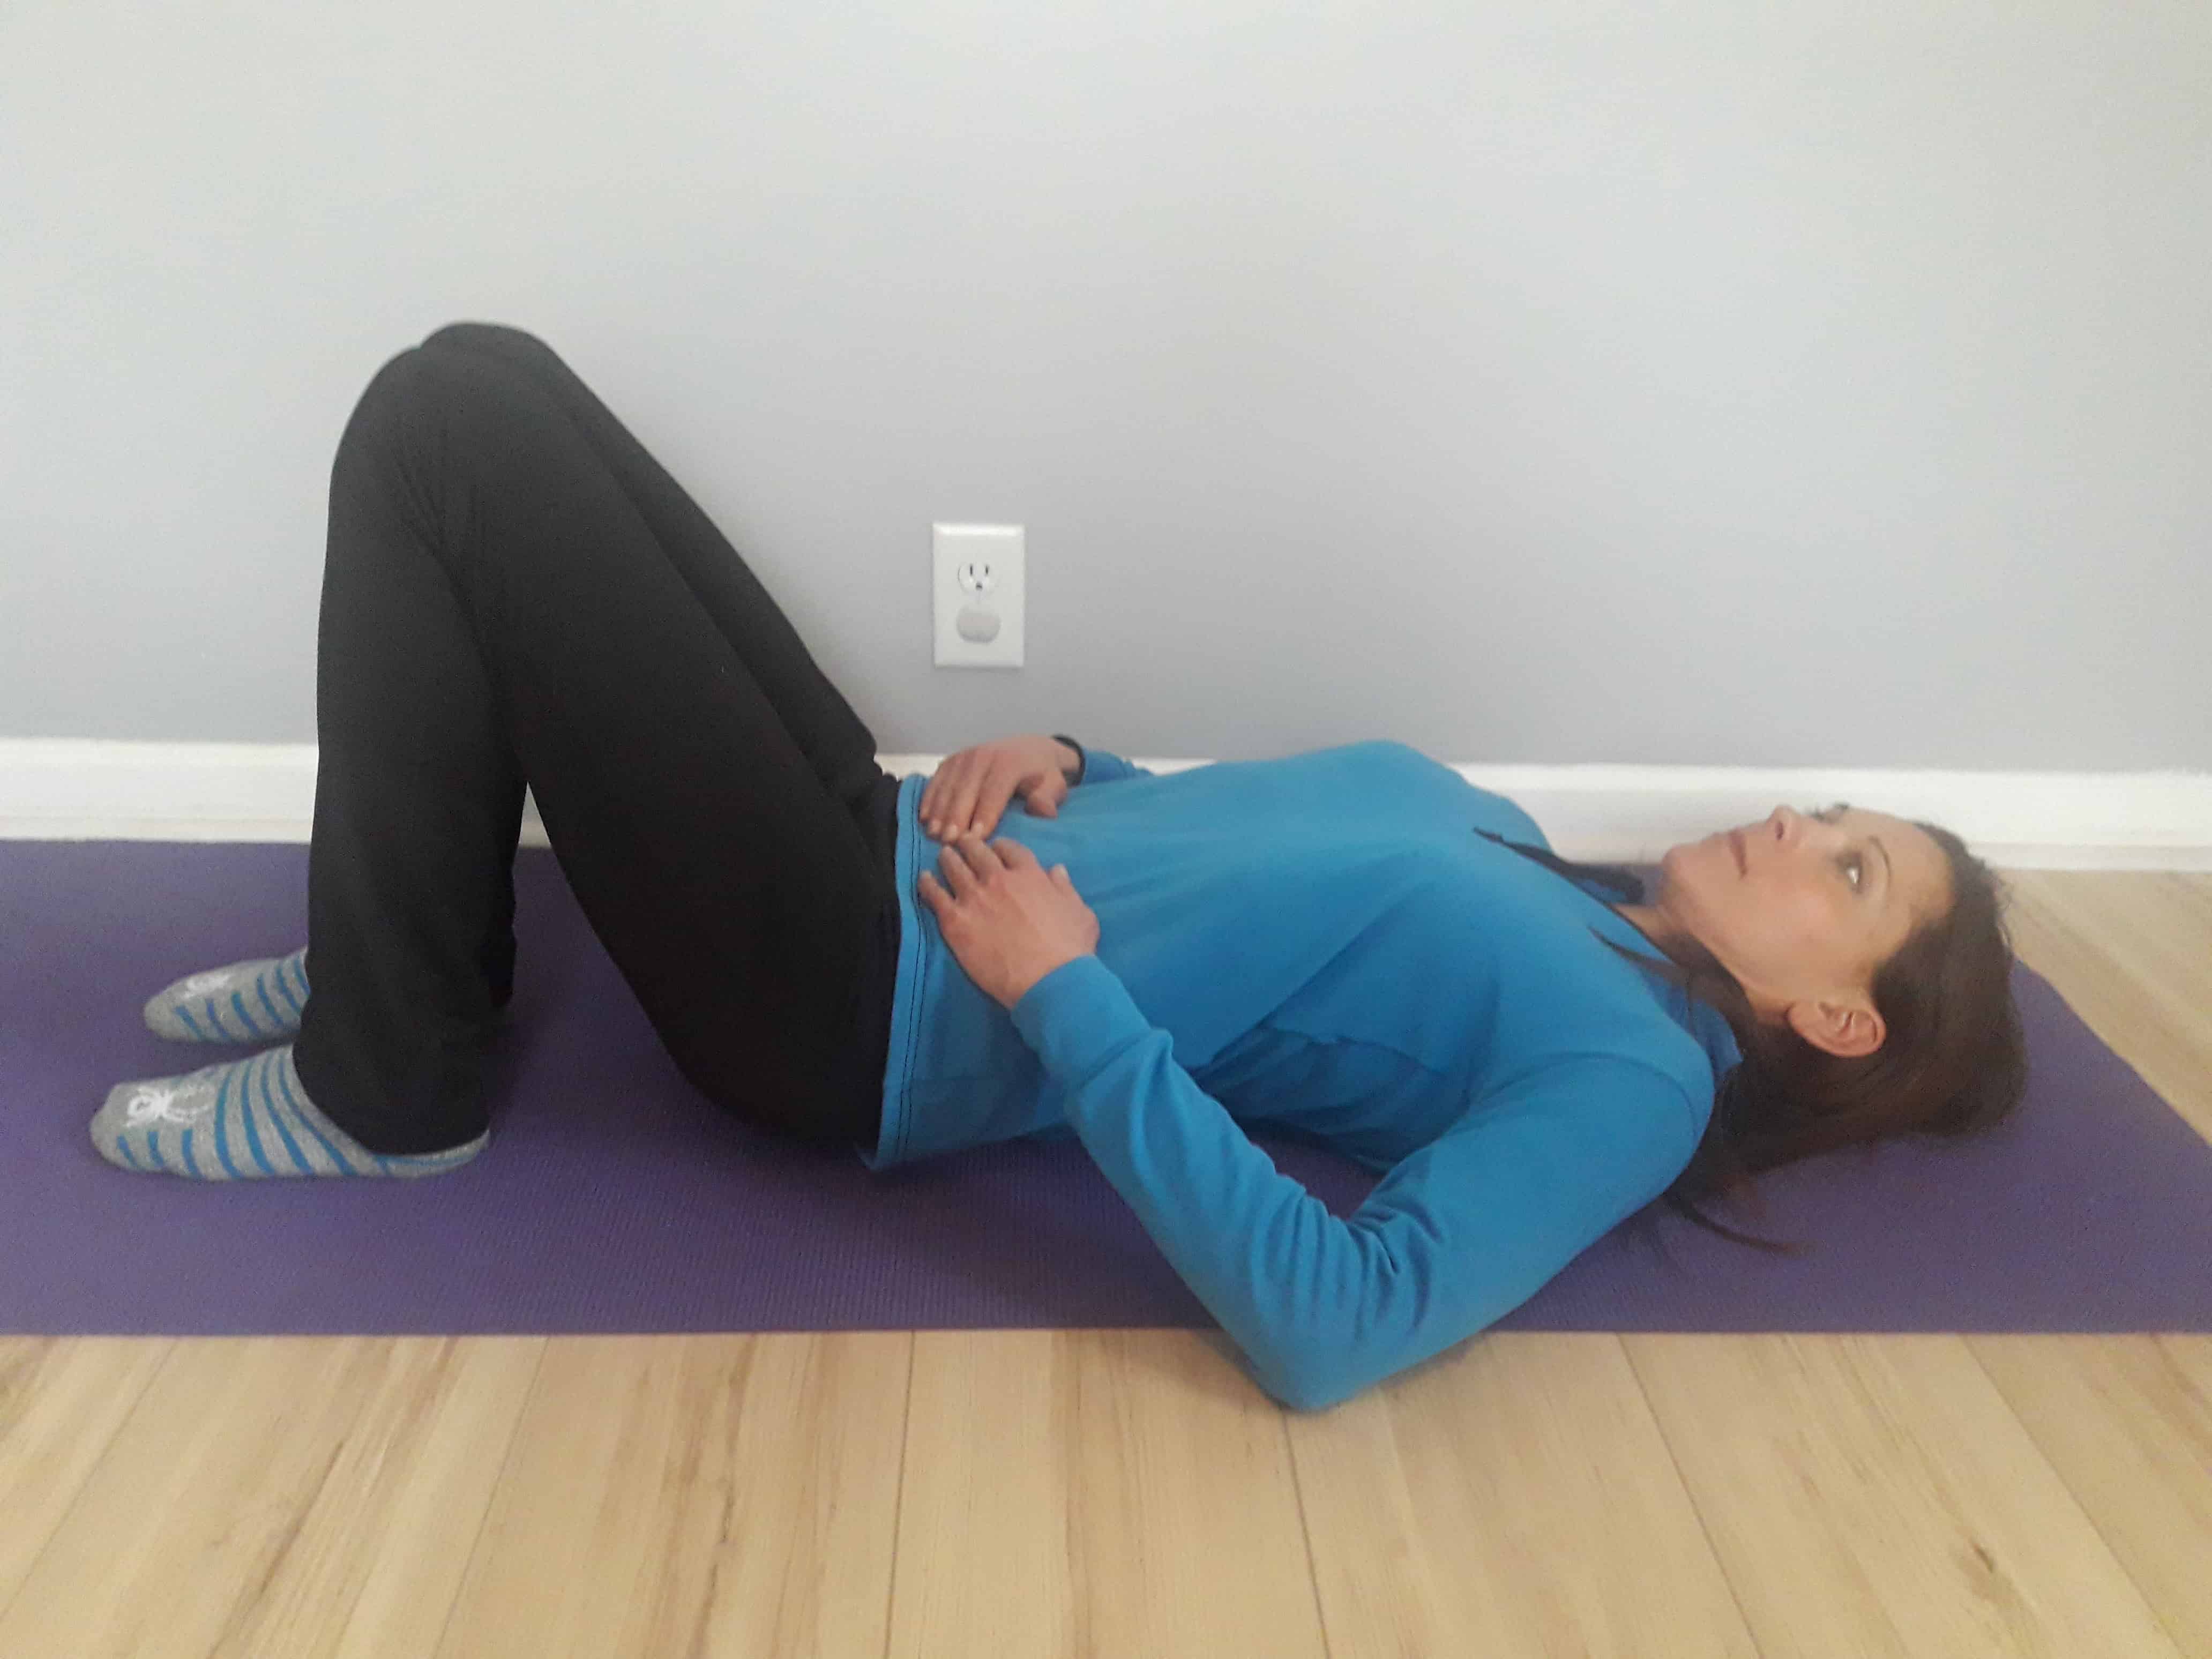
This is harder than it sounds for most people and may take some practice. Do not suck in and hold your breath which simply contracts the diaphragm. You can place your fingertips on the sides of your abdomen to get tactile feedback of the muscles tightening.
Start by holding the contraction for ten seconds while maintaining normal breathing. After you are comfortable with this exercise lying on your back you can practice while sitting and standing. Abdominal bracing is then incorporated with all the other exercises.
Bridge
Bridging is performed by lying on your back with the feet flat on the floor. This exercises works the muscles that extend the back and hips while requiring co-contraction of the abdominals to stabilize the trunk.
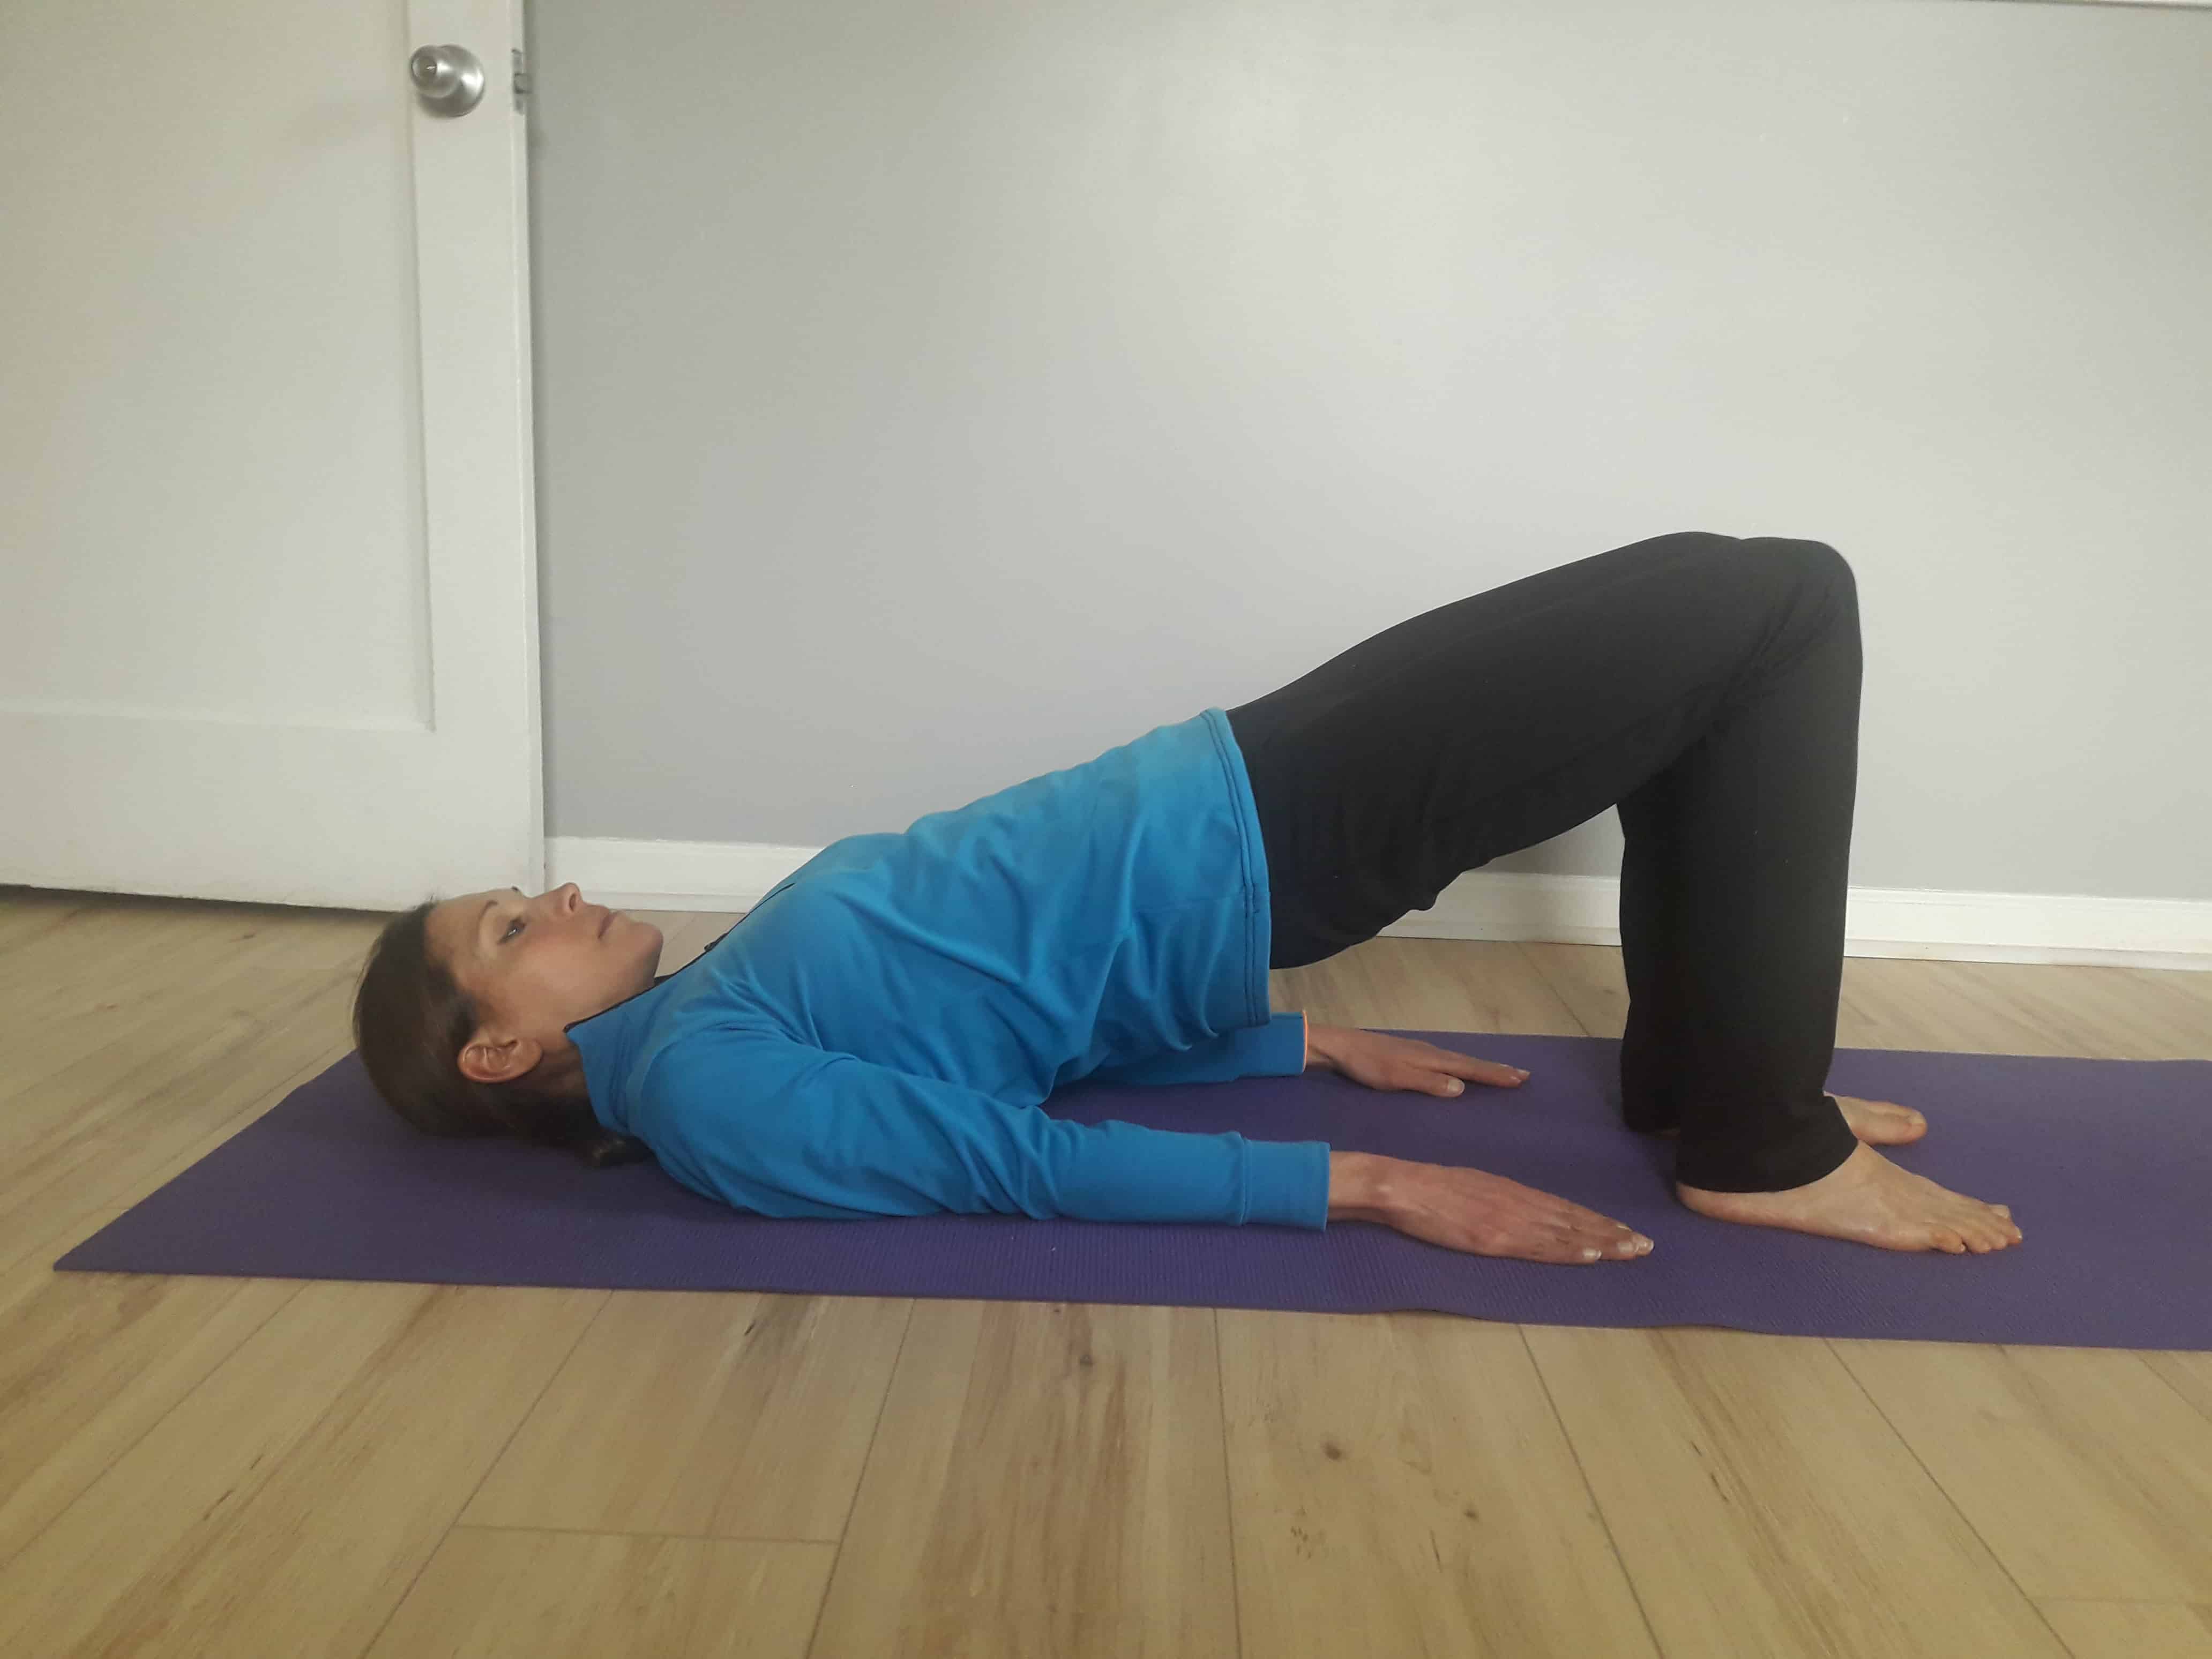
Start by bracing the abdominals, then push through both feet and lift your butt from the floor.
Your goal is to obtain a straight line from the shoulders to the knees. Avoid letting the pelvis sag down or lifting too high causing the back to arch. Start by holding this position for five to ten seconds while focusing on not holding your breath. Increase hold times as able without losing form.
As this exercise gets easy, you can make it more challenging by doing single leg bridges, lifting the opposite foot from the floor. Progressing to a single leg bridge is substantially harder. Be sure you can obtain the straight line position from shoulders to knees while also not letting the pelvis drop on either side.
Side Planks
Side planks are performed by starting lying on your side propped up on one arm with the elbow directly beneath the shoulder. Push through the lower arm to lift the pelvis from the floor.
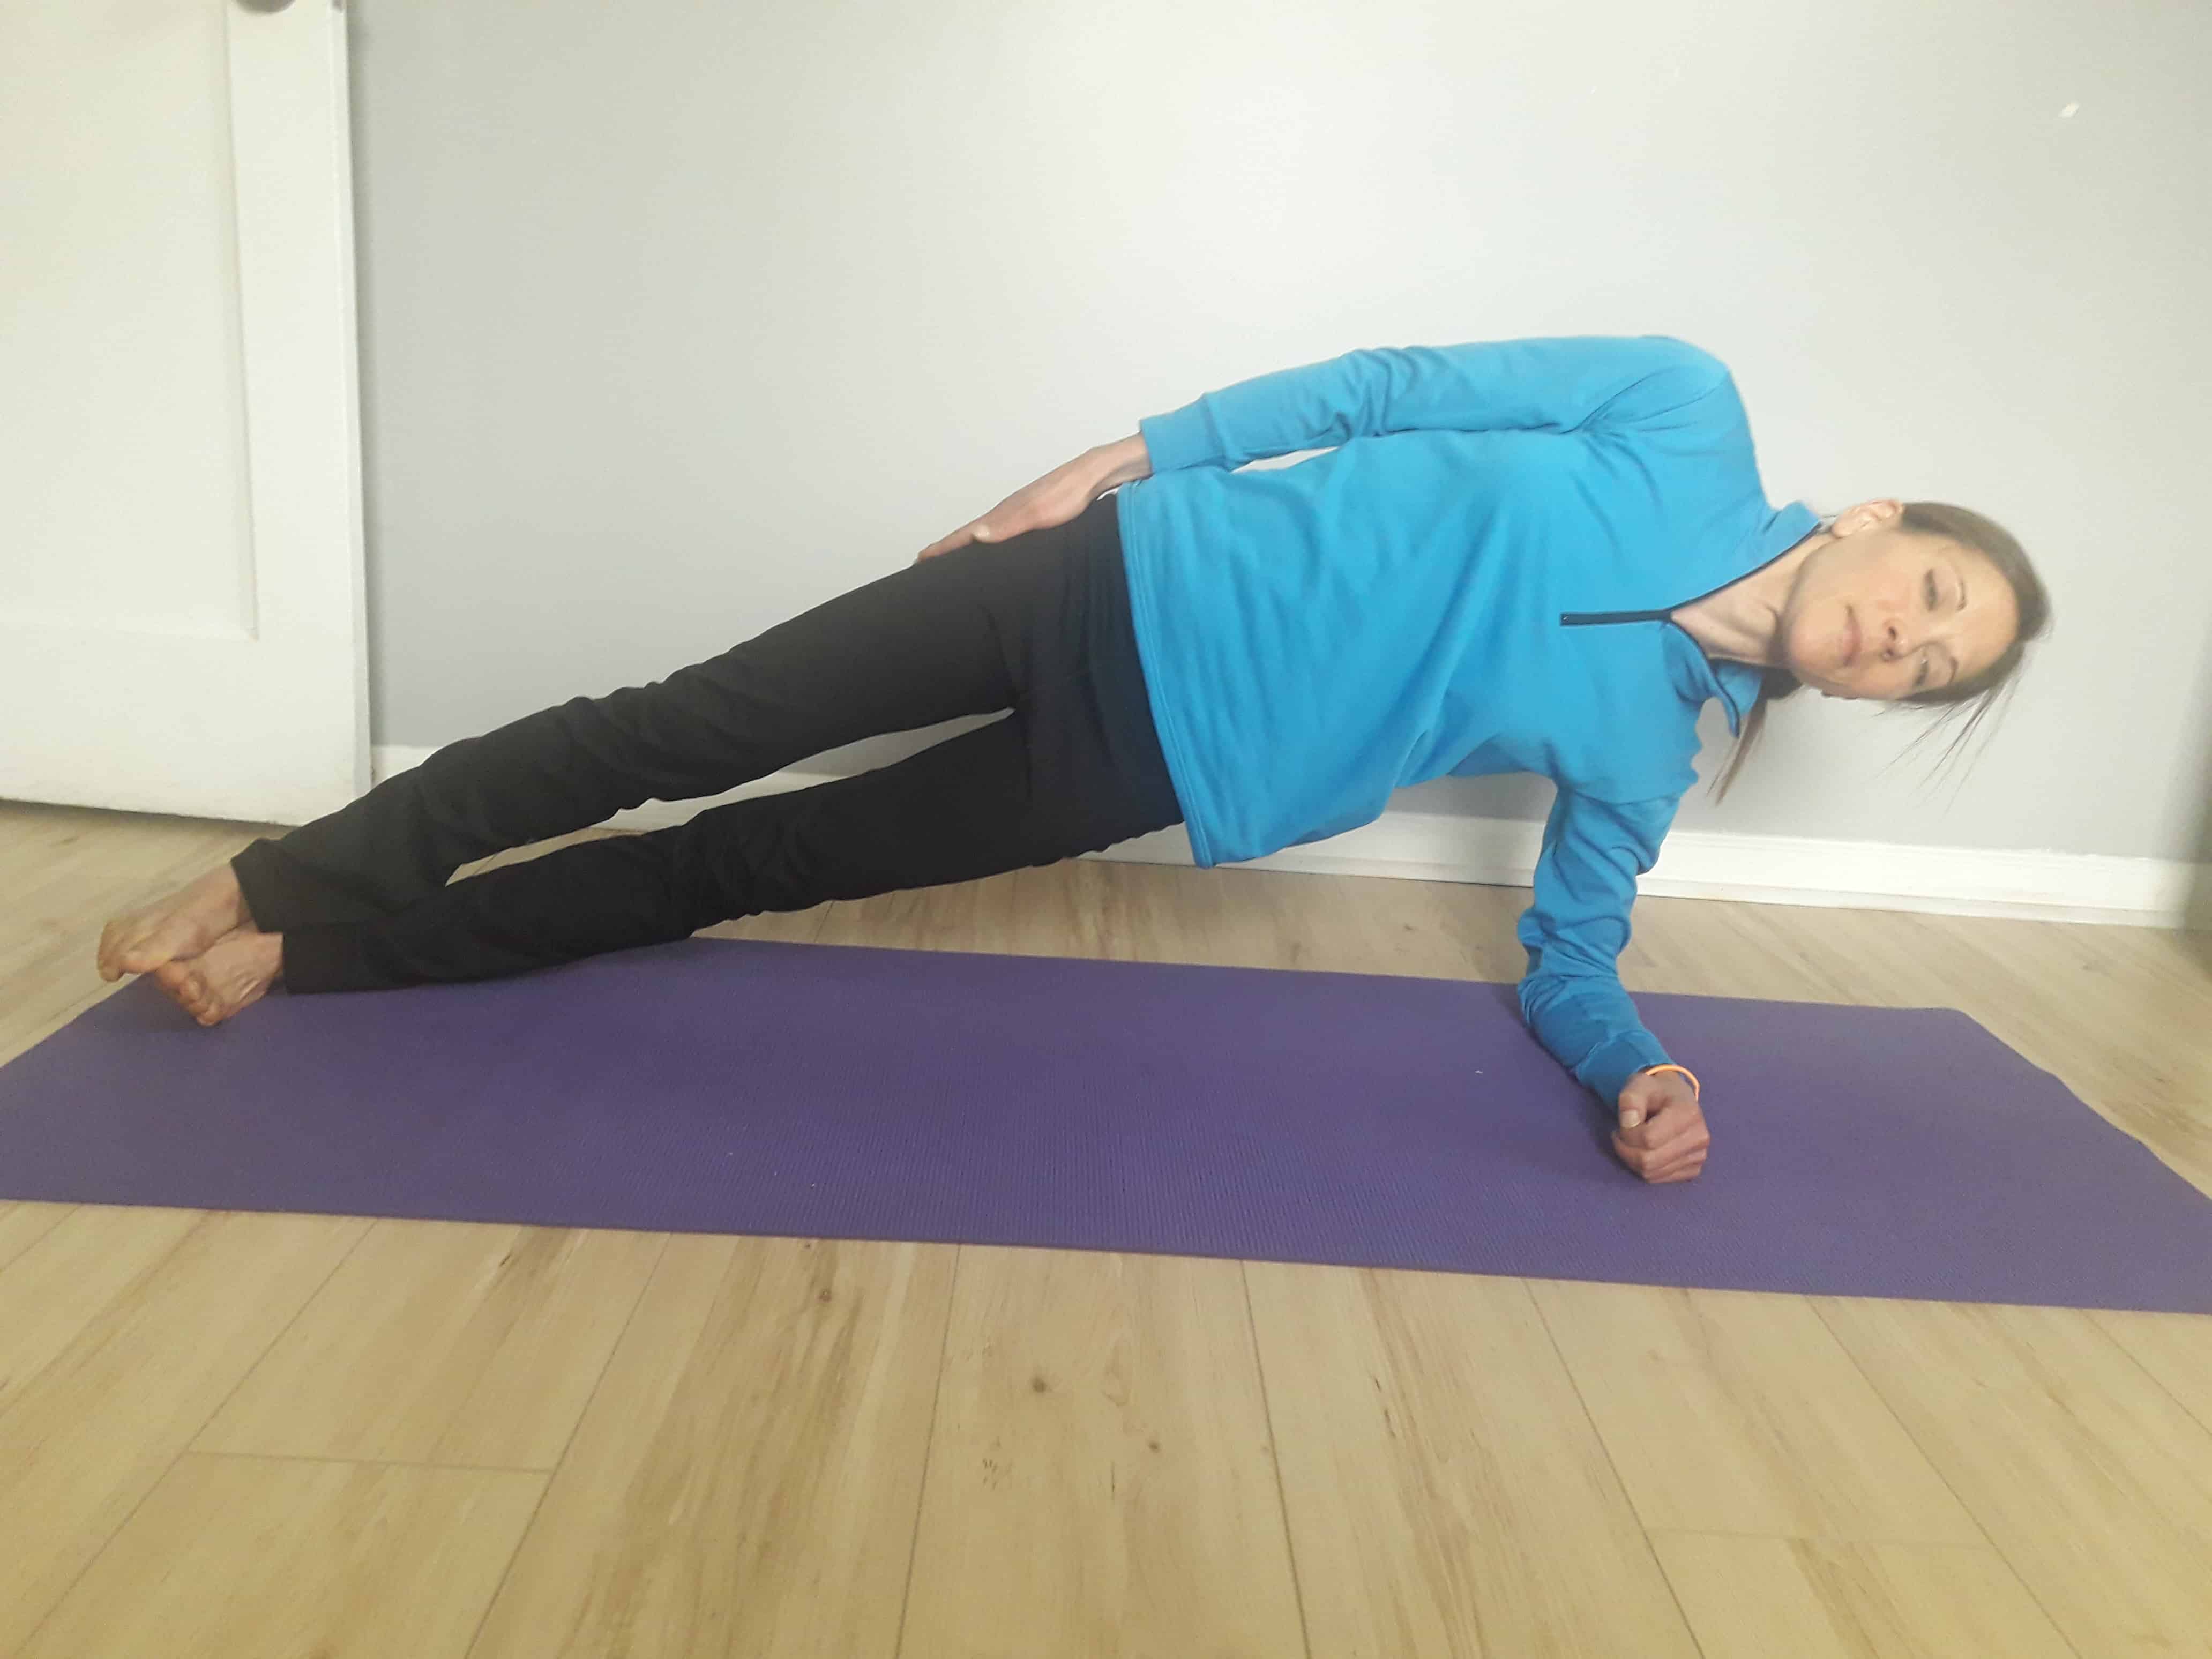
You are trying to obtain the position of a straight line from the feet to the shoulders. Avoid allowing the pelvis to sag downward, drift forward or back, or to rotate.
This is a great exercise to work the transverse abdominis, oblique abdominals, hip abductors, and back musculature.
Start by holding this position for five to ten seconds while focusing on not holding your breath. Increase hold times as able without losing form.
If this is too challenging when starting, you can modify by bending your knees and lifting the trunk by pushing through the side of the knee and the elbow.
As the exercise becomes too easy, you can extend the elbow and place the palm of the hand down on the floor to make it more challenging.
Planks
Planks are performed starting lying on your stomach propped up on your forearms. From this position lift your body from the floor into the plank position. This exercise works the abdominals, hip flexors, shoulders and deep neck flexors to obtain and remain stable in this position. Again brace with the abdominals while focusing on breathing.
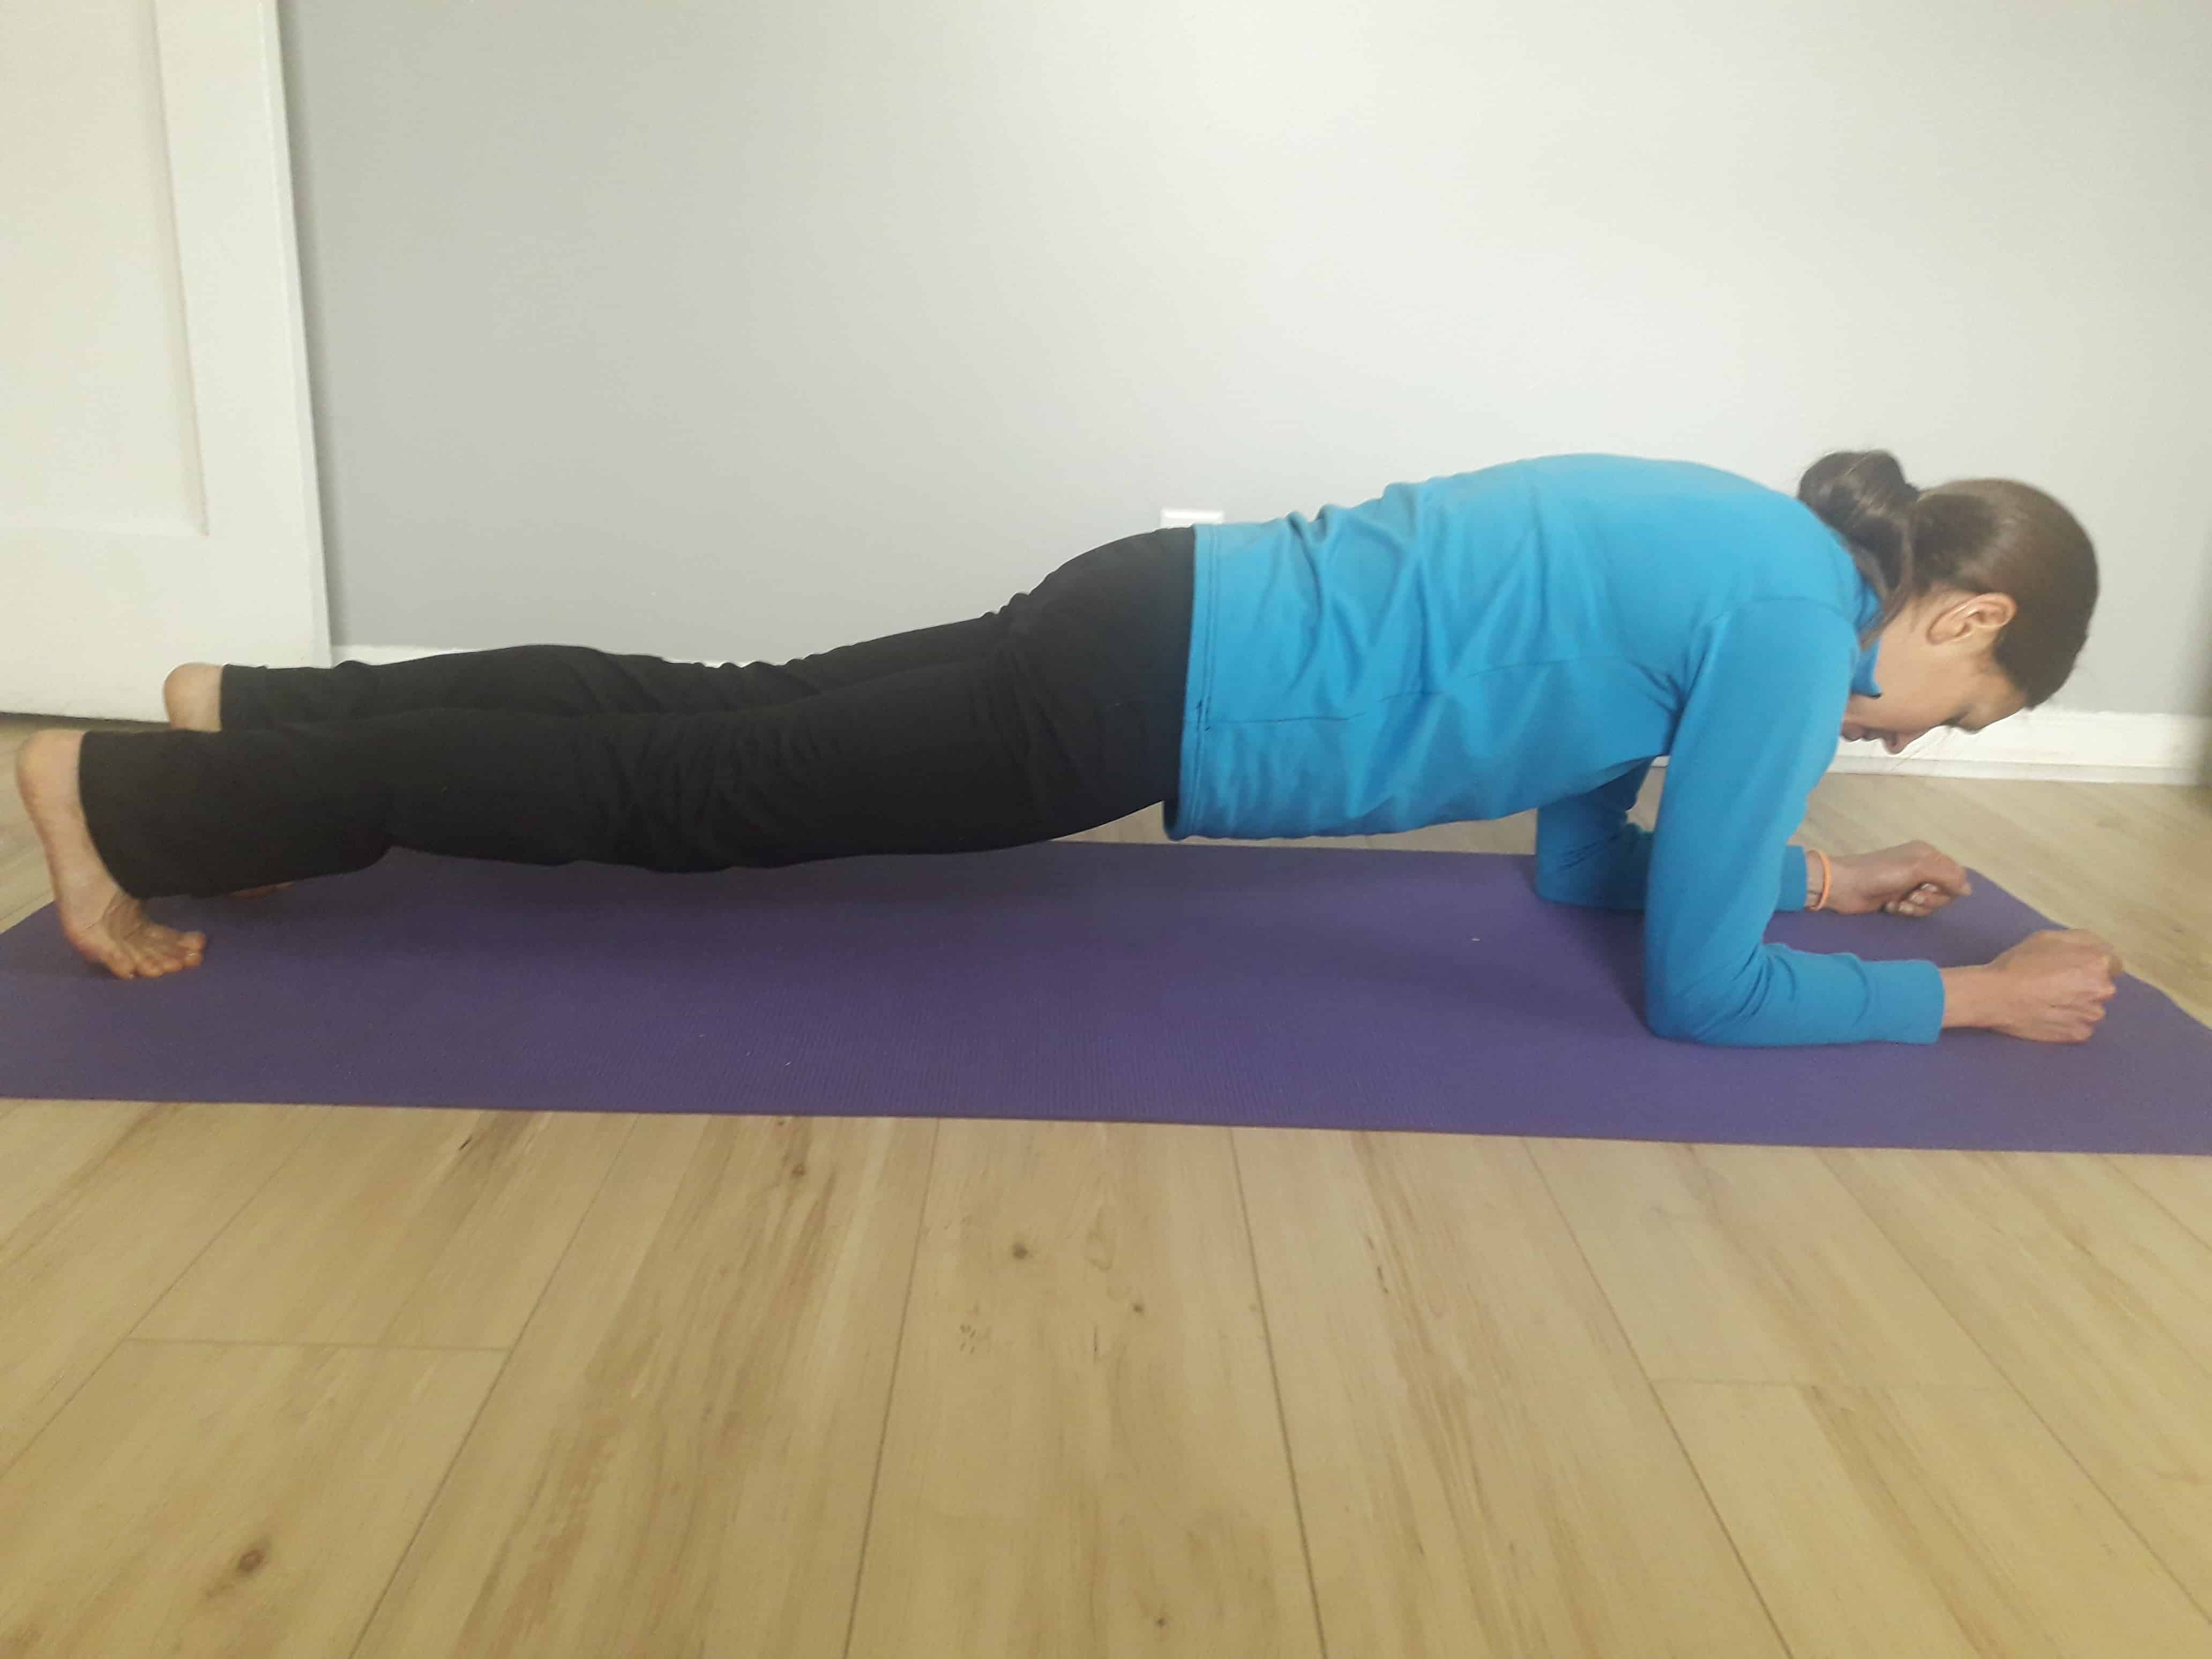
The goal is to create a straight line from the heels to the top of the head. Keep the knees straight. Avoid letting the pelvis sag down, arching the back, or lifting the butt too high in the air. Also be aware of the position of the head, tucking the chin slightly toward the chest to prevent extending the neck and looking upward.
Start by holding this position for five to ten seconds without holding your breath. Increase hold times as able without losing form. If this becomes easy, you can try to lift one foot slightly from the floor while keeping the rest of the body stable.
Bird Dogs
Bird dogs are performed by starting on your hands and knees. From this position, start by bracing with the abdominal muscles to maintain a stable trunk.
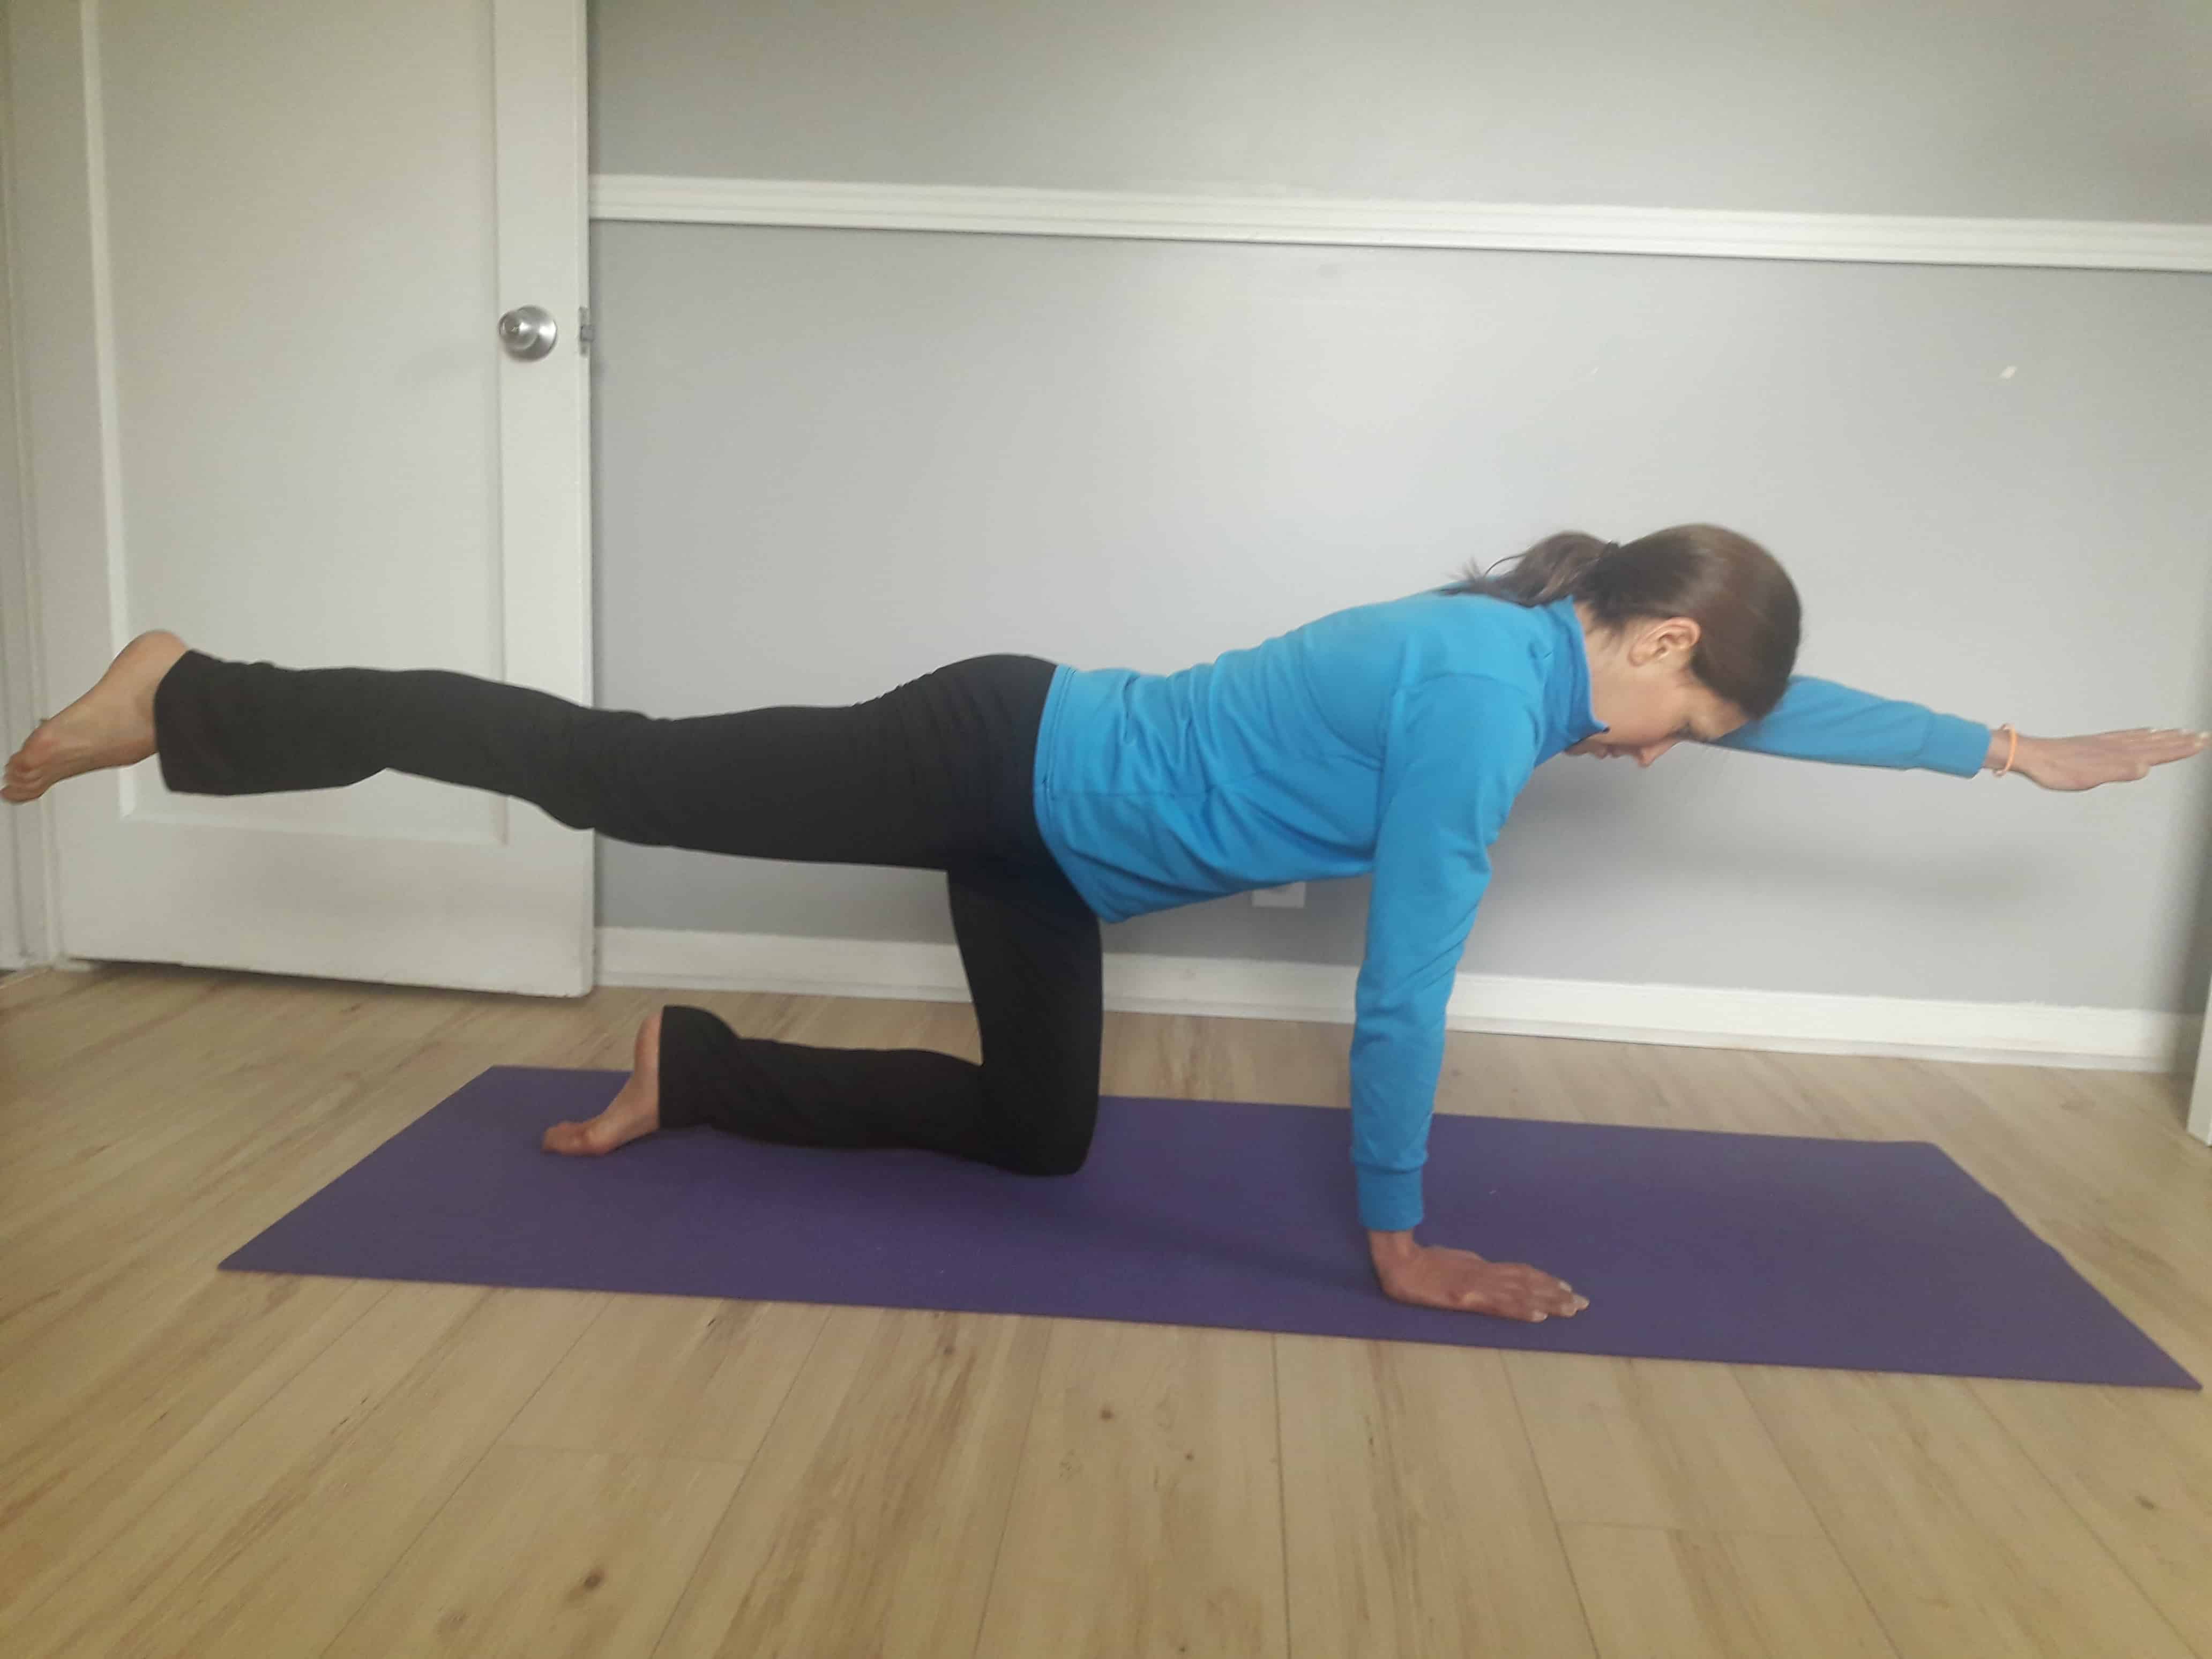
Slowly lift one leg back while simultaneously lifting the opposite arm forward while maintaining the trunk and head position.
This is a great exercise to strengthen the back extensors while engaging the abdominals and deep neck flexors to help stabilize the spine when moving the extremities.
Start with 5-10 repetitions on each side. Hold each repetition for 5-10 seconds as able while focusing on maintaining a stable trunk and not holding your breath.
Upper Extremity Strength
Last month I discussed common posture and mobility deficits. There is a clear pattern of upper extremity muscle weakness that accompanies these problems. Three muscle groups are commonly affected:
- The scapular (shoulder blade) stabilizing muscles.
- The rotator cuff muscles of the shoulder.
- The deep neck flexors.
Weakness of these muscle groups can be addressed with a few exercises that incorporate synergistic movements.
T’s and Y’s
The first two exercises work different combinations of scapula stabilizer and rotator cuff muscles. Performing the exercises correctly also requires the activation of the deep neck flexors to control the position of the head and the trunk muscles to provide a stable base for the movements.
For both exercises you will start with your chest on a theraball with your hands on the floor. First extend the upper back by slightly lifting the chest off the ball. Then tuck your chin to your chest. Fixate the eyes on a specific spot on the floor to maintain this head position.
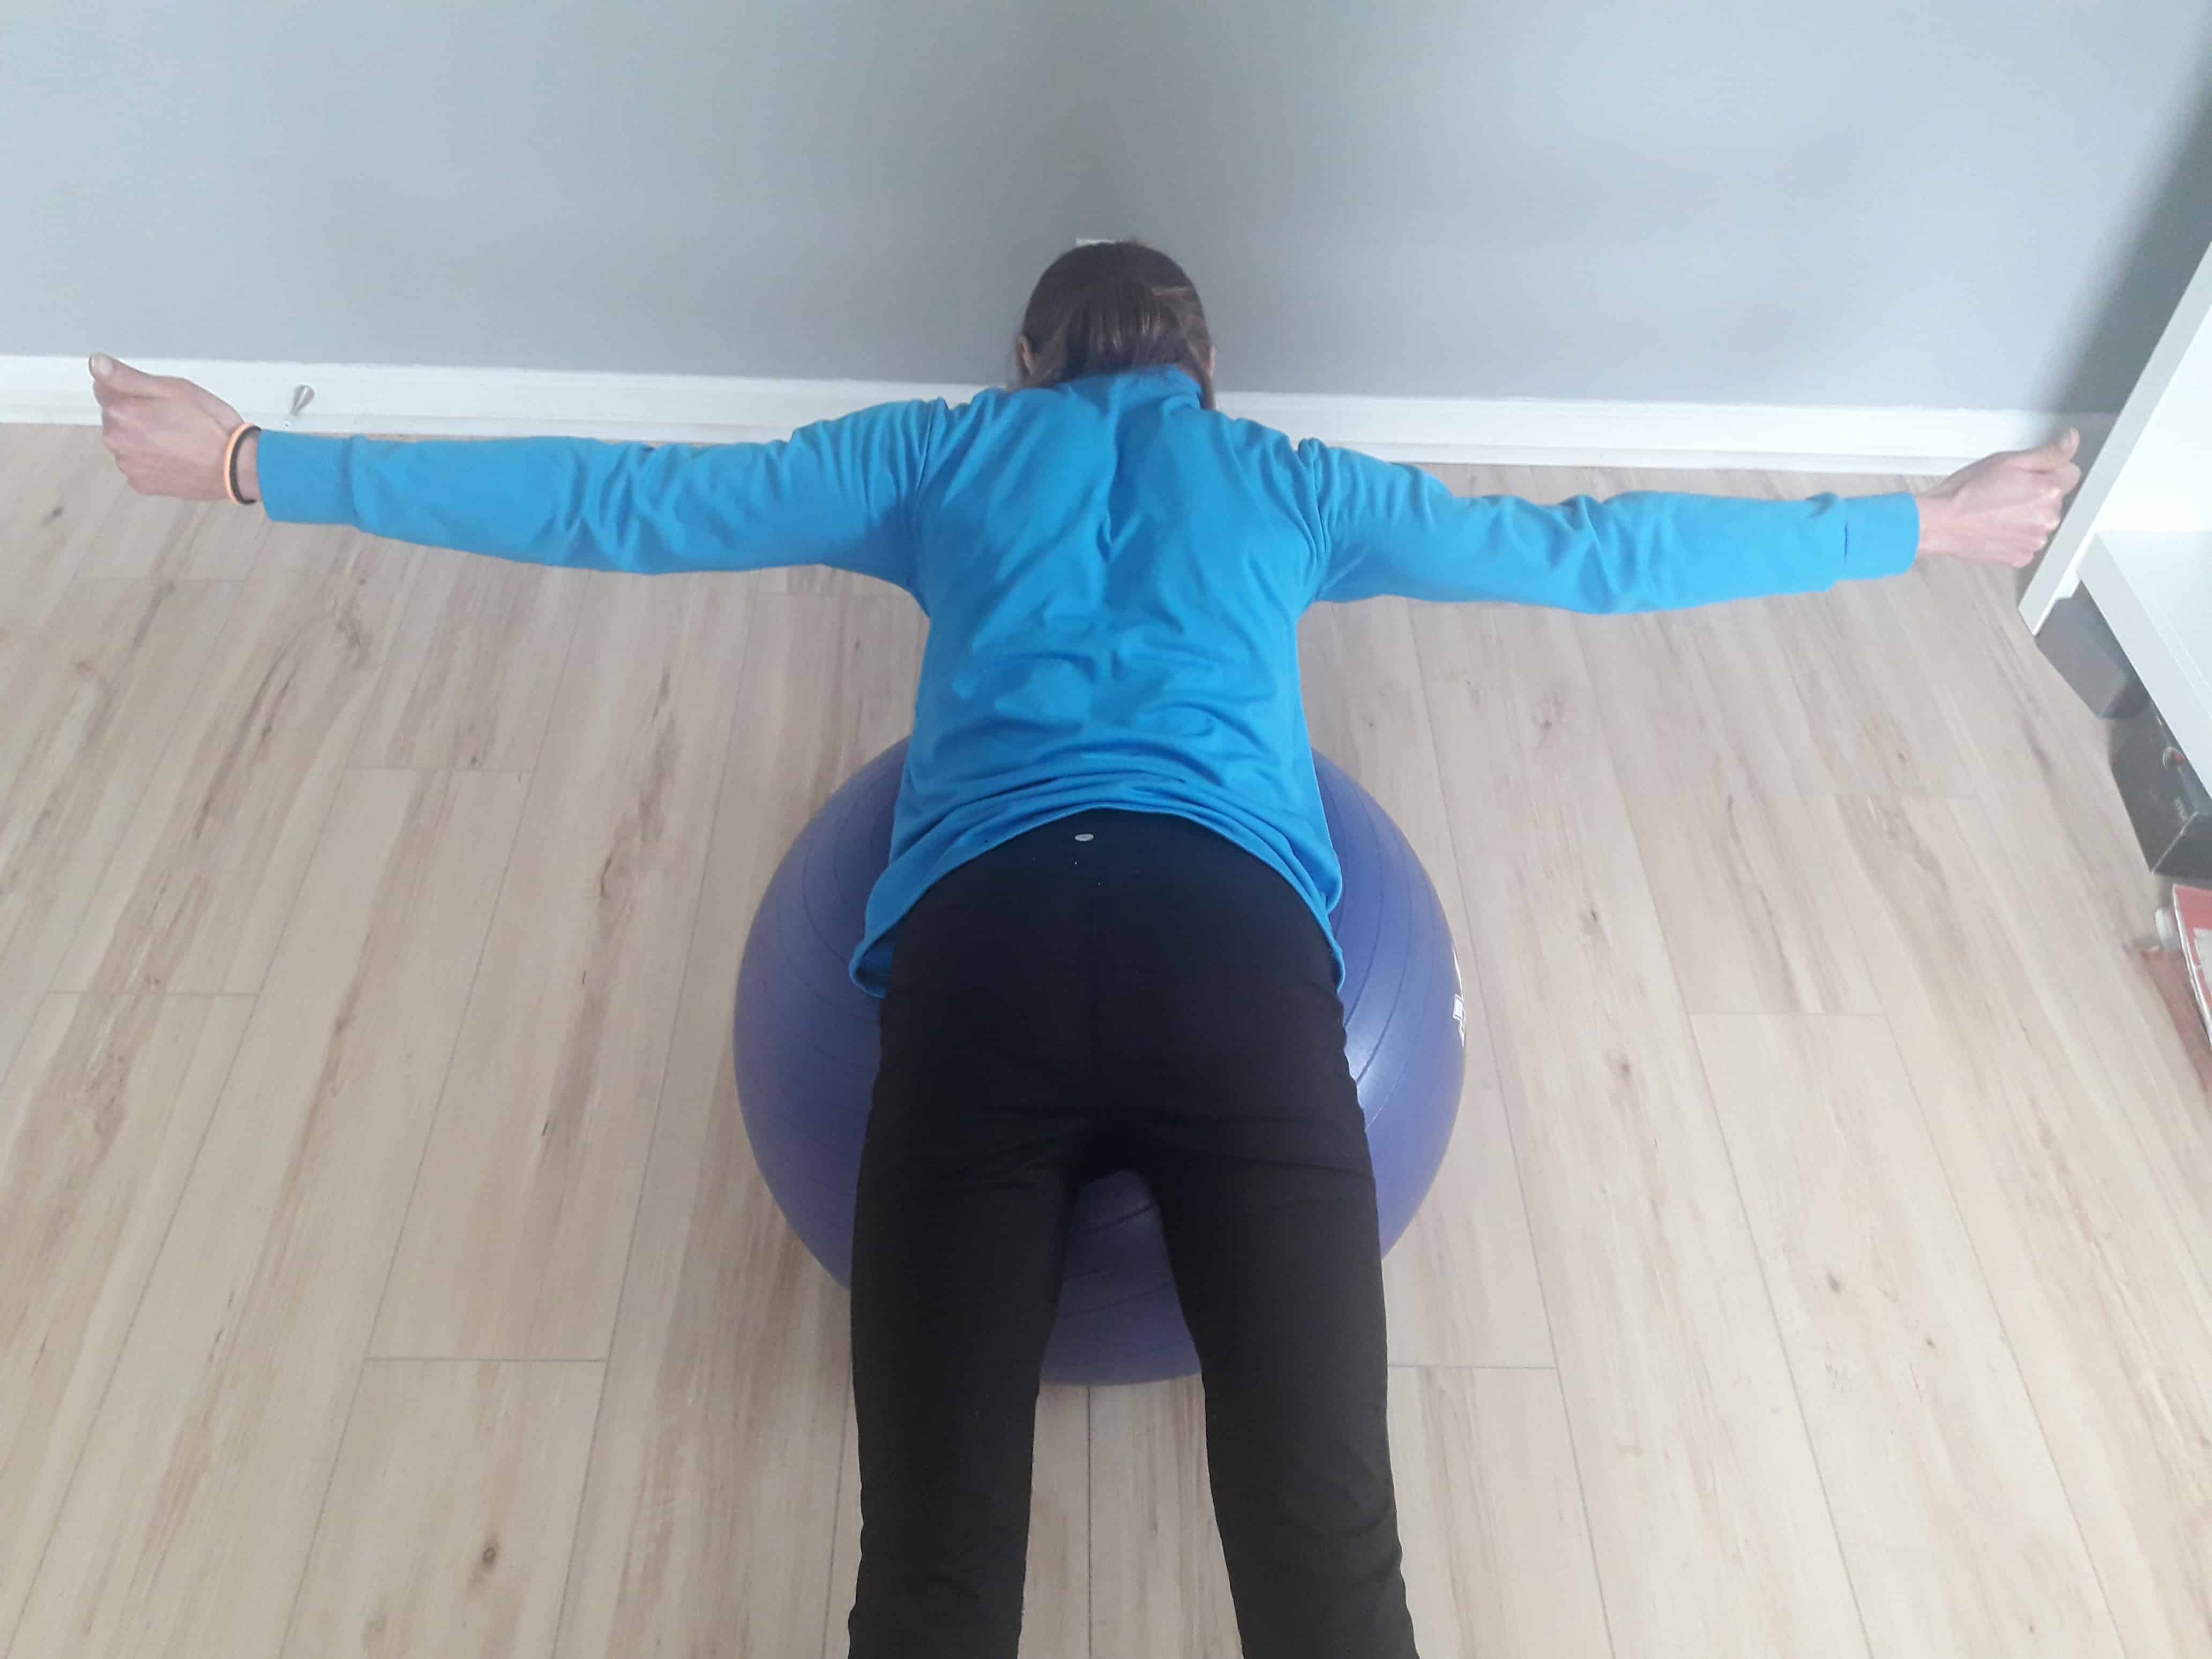
The T exercise is performed by lifting your arms directly out to the side of the body until they are parallel to the floor. While performing this movement think about squeezing the shoulder blades together.
Have someone watch you the first few times you perform this movement. Your ending position should look like the letter T.
Common compensations are for the arms to drift down toward the hips, losing the head position by looking upward, or lifting the arms without moving the shoulder blades, causing the hands to break the plain of the body putting stress on the front of the shoulders.

The Y exercise is performed by lifting your arms away from the floor about half way between shoulder height and directly overhead. Your ending position will look like the letter Y.
Common compensations with this exercise are to shrug the shoulder blades and look upward. It is wise to have someone watch you and look for these compensations the first few times the exercises are performed.
Start with 8-10 repetitions of each exercise. Pause at the top of the position for 3-5 seconds. You can increase the hold time at end range or add small weights to the hands as this exercise gets easy. Rarely will you need more than two to three pounds of resistance.
Bilateral Resisted External Rotation
The next exercise incorporates a resistance band to strengthen the external rotators of the shoulders and the scapular stabilizers.
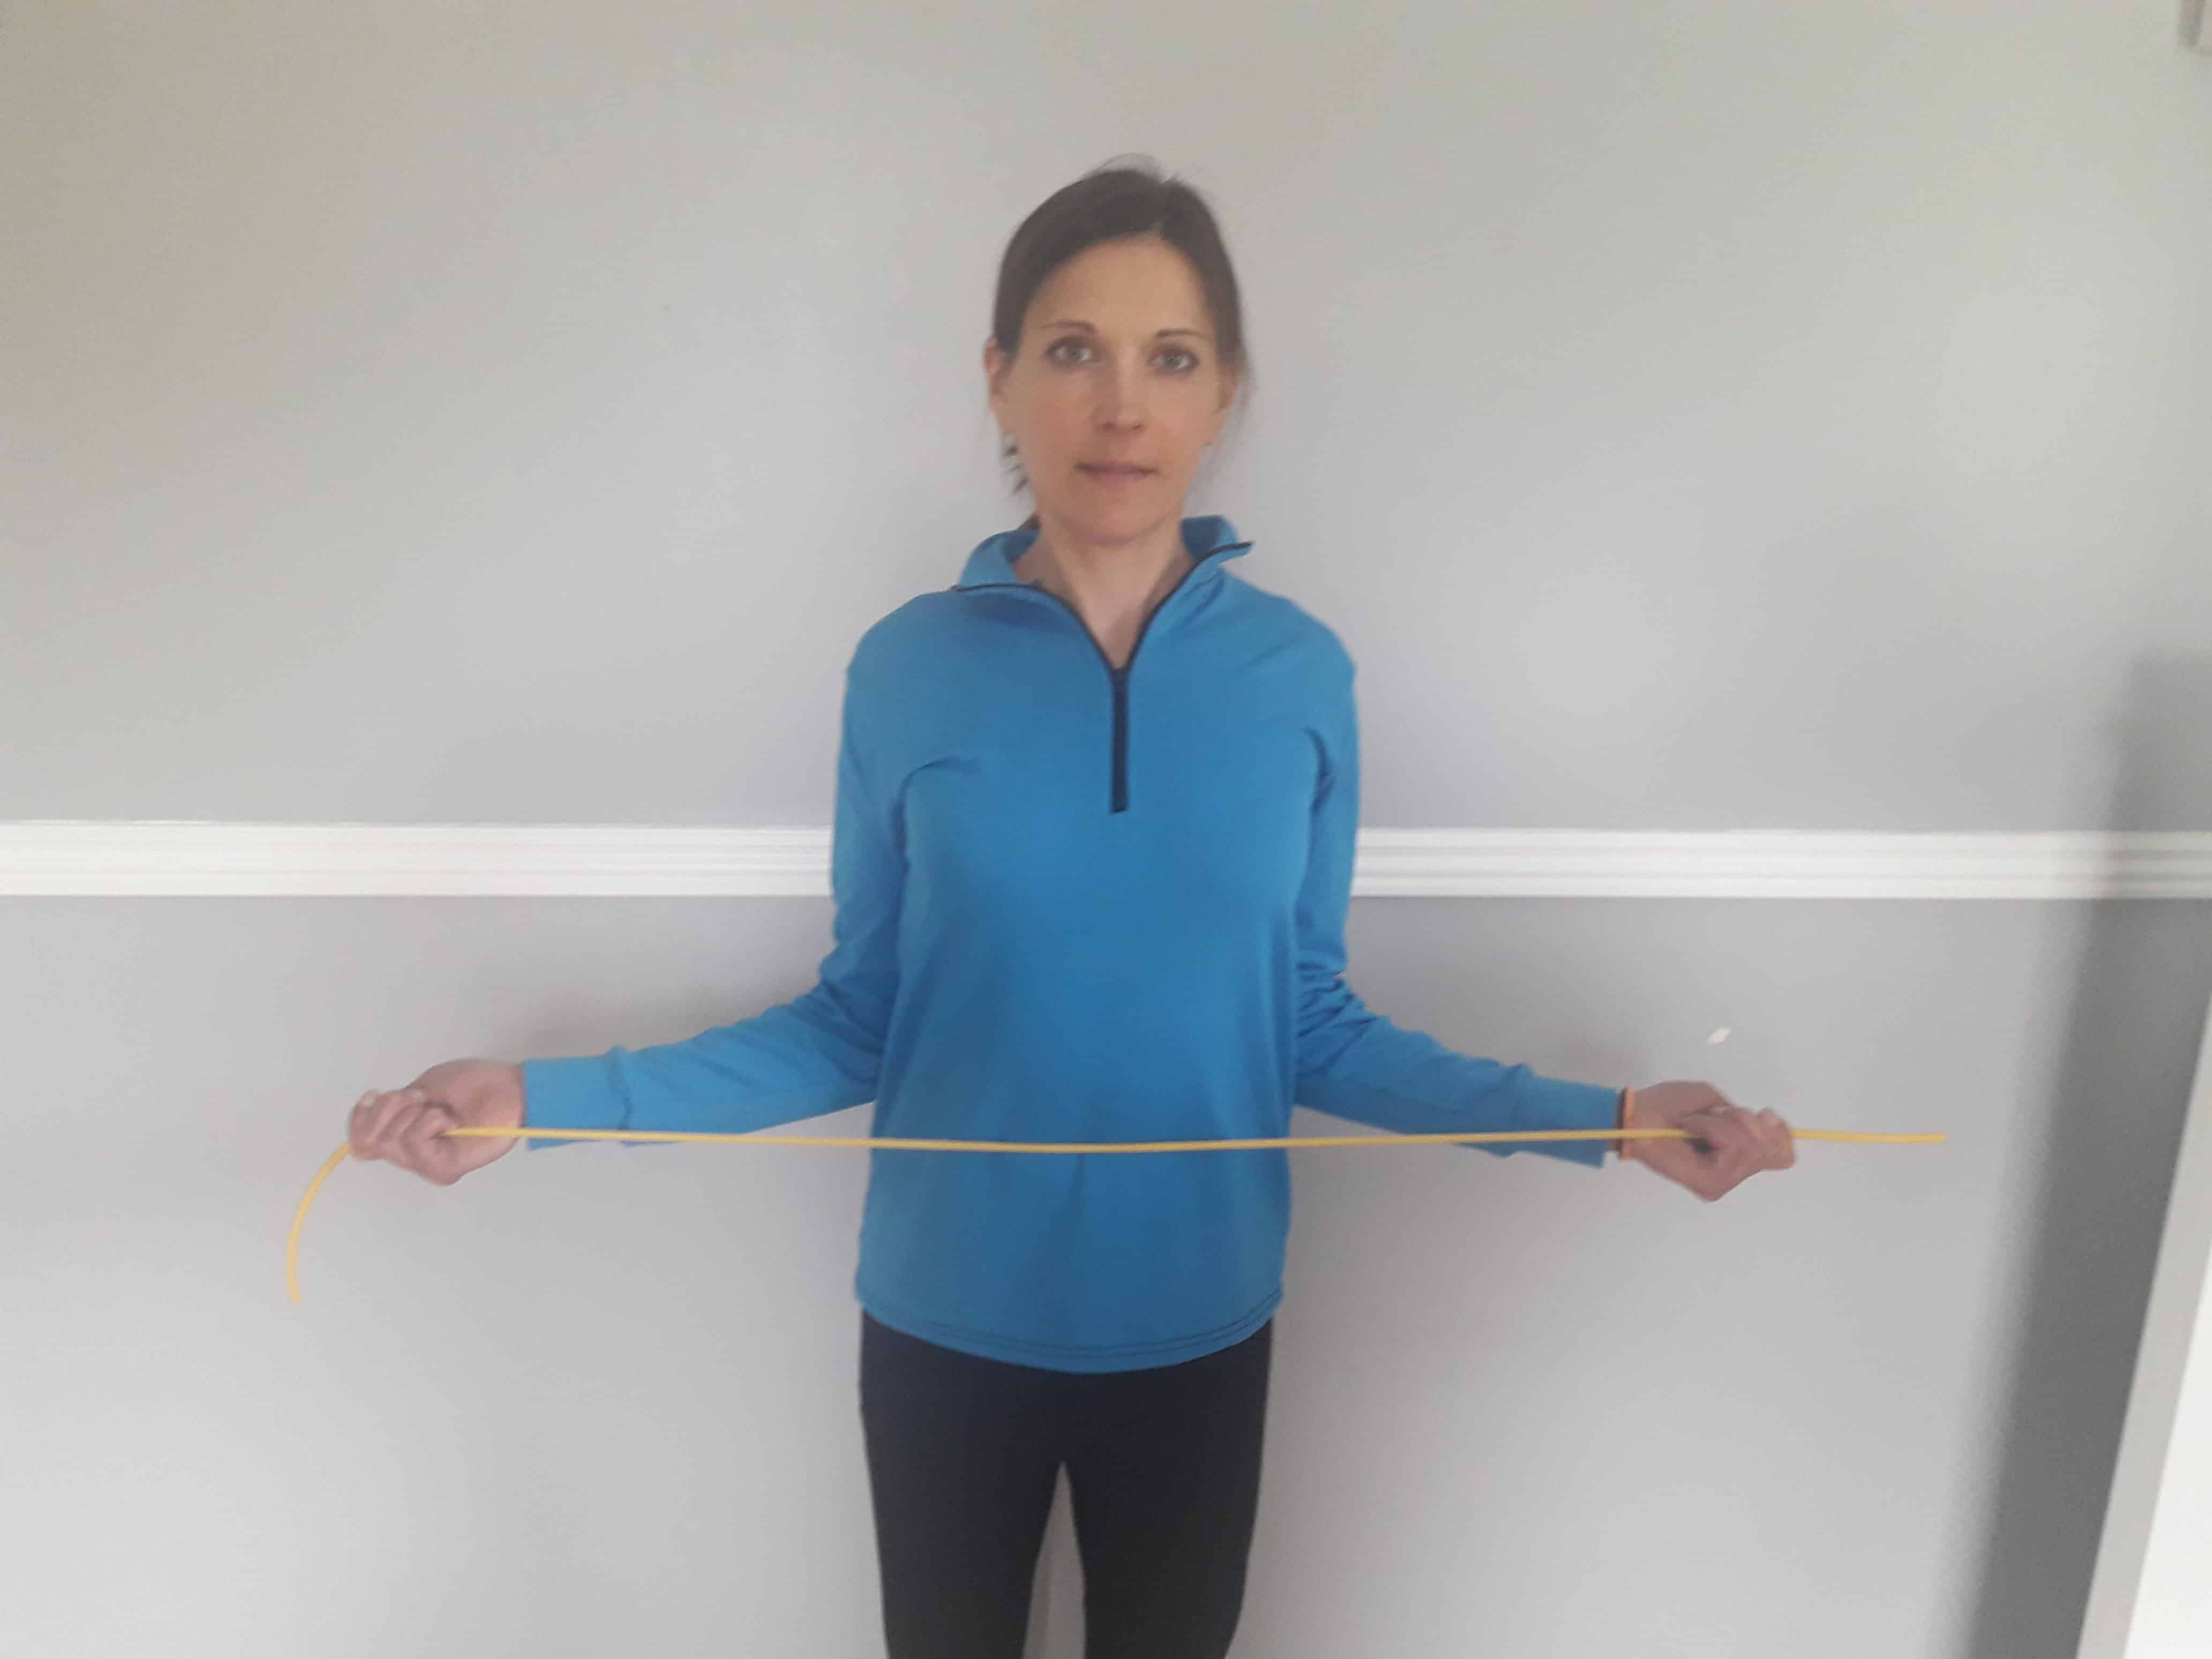
Sit or stand with the elbows at the side, palms up holding the resistance band. Brace the abdominals.
Keeping the elbows tight against the body, rotate your arms so the hands separate. Leave enough slack in the band to allow the exercise to be performed through full range of motion without compensating by shrugging the shoulders.
Hold for 5-10 seconds. Repeat 10 times. As the exercise becomes easy, increase resistance by starting with less slack in the band or go to a band with higher resistance.
Resisted Rowing
This exercise will also be performed with a resistance band. Wrap the band around a pole or have someone hold the middle while you hold an end in each hand. Tuck the chin toward the chest and brace with the abdominals.
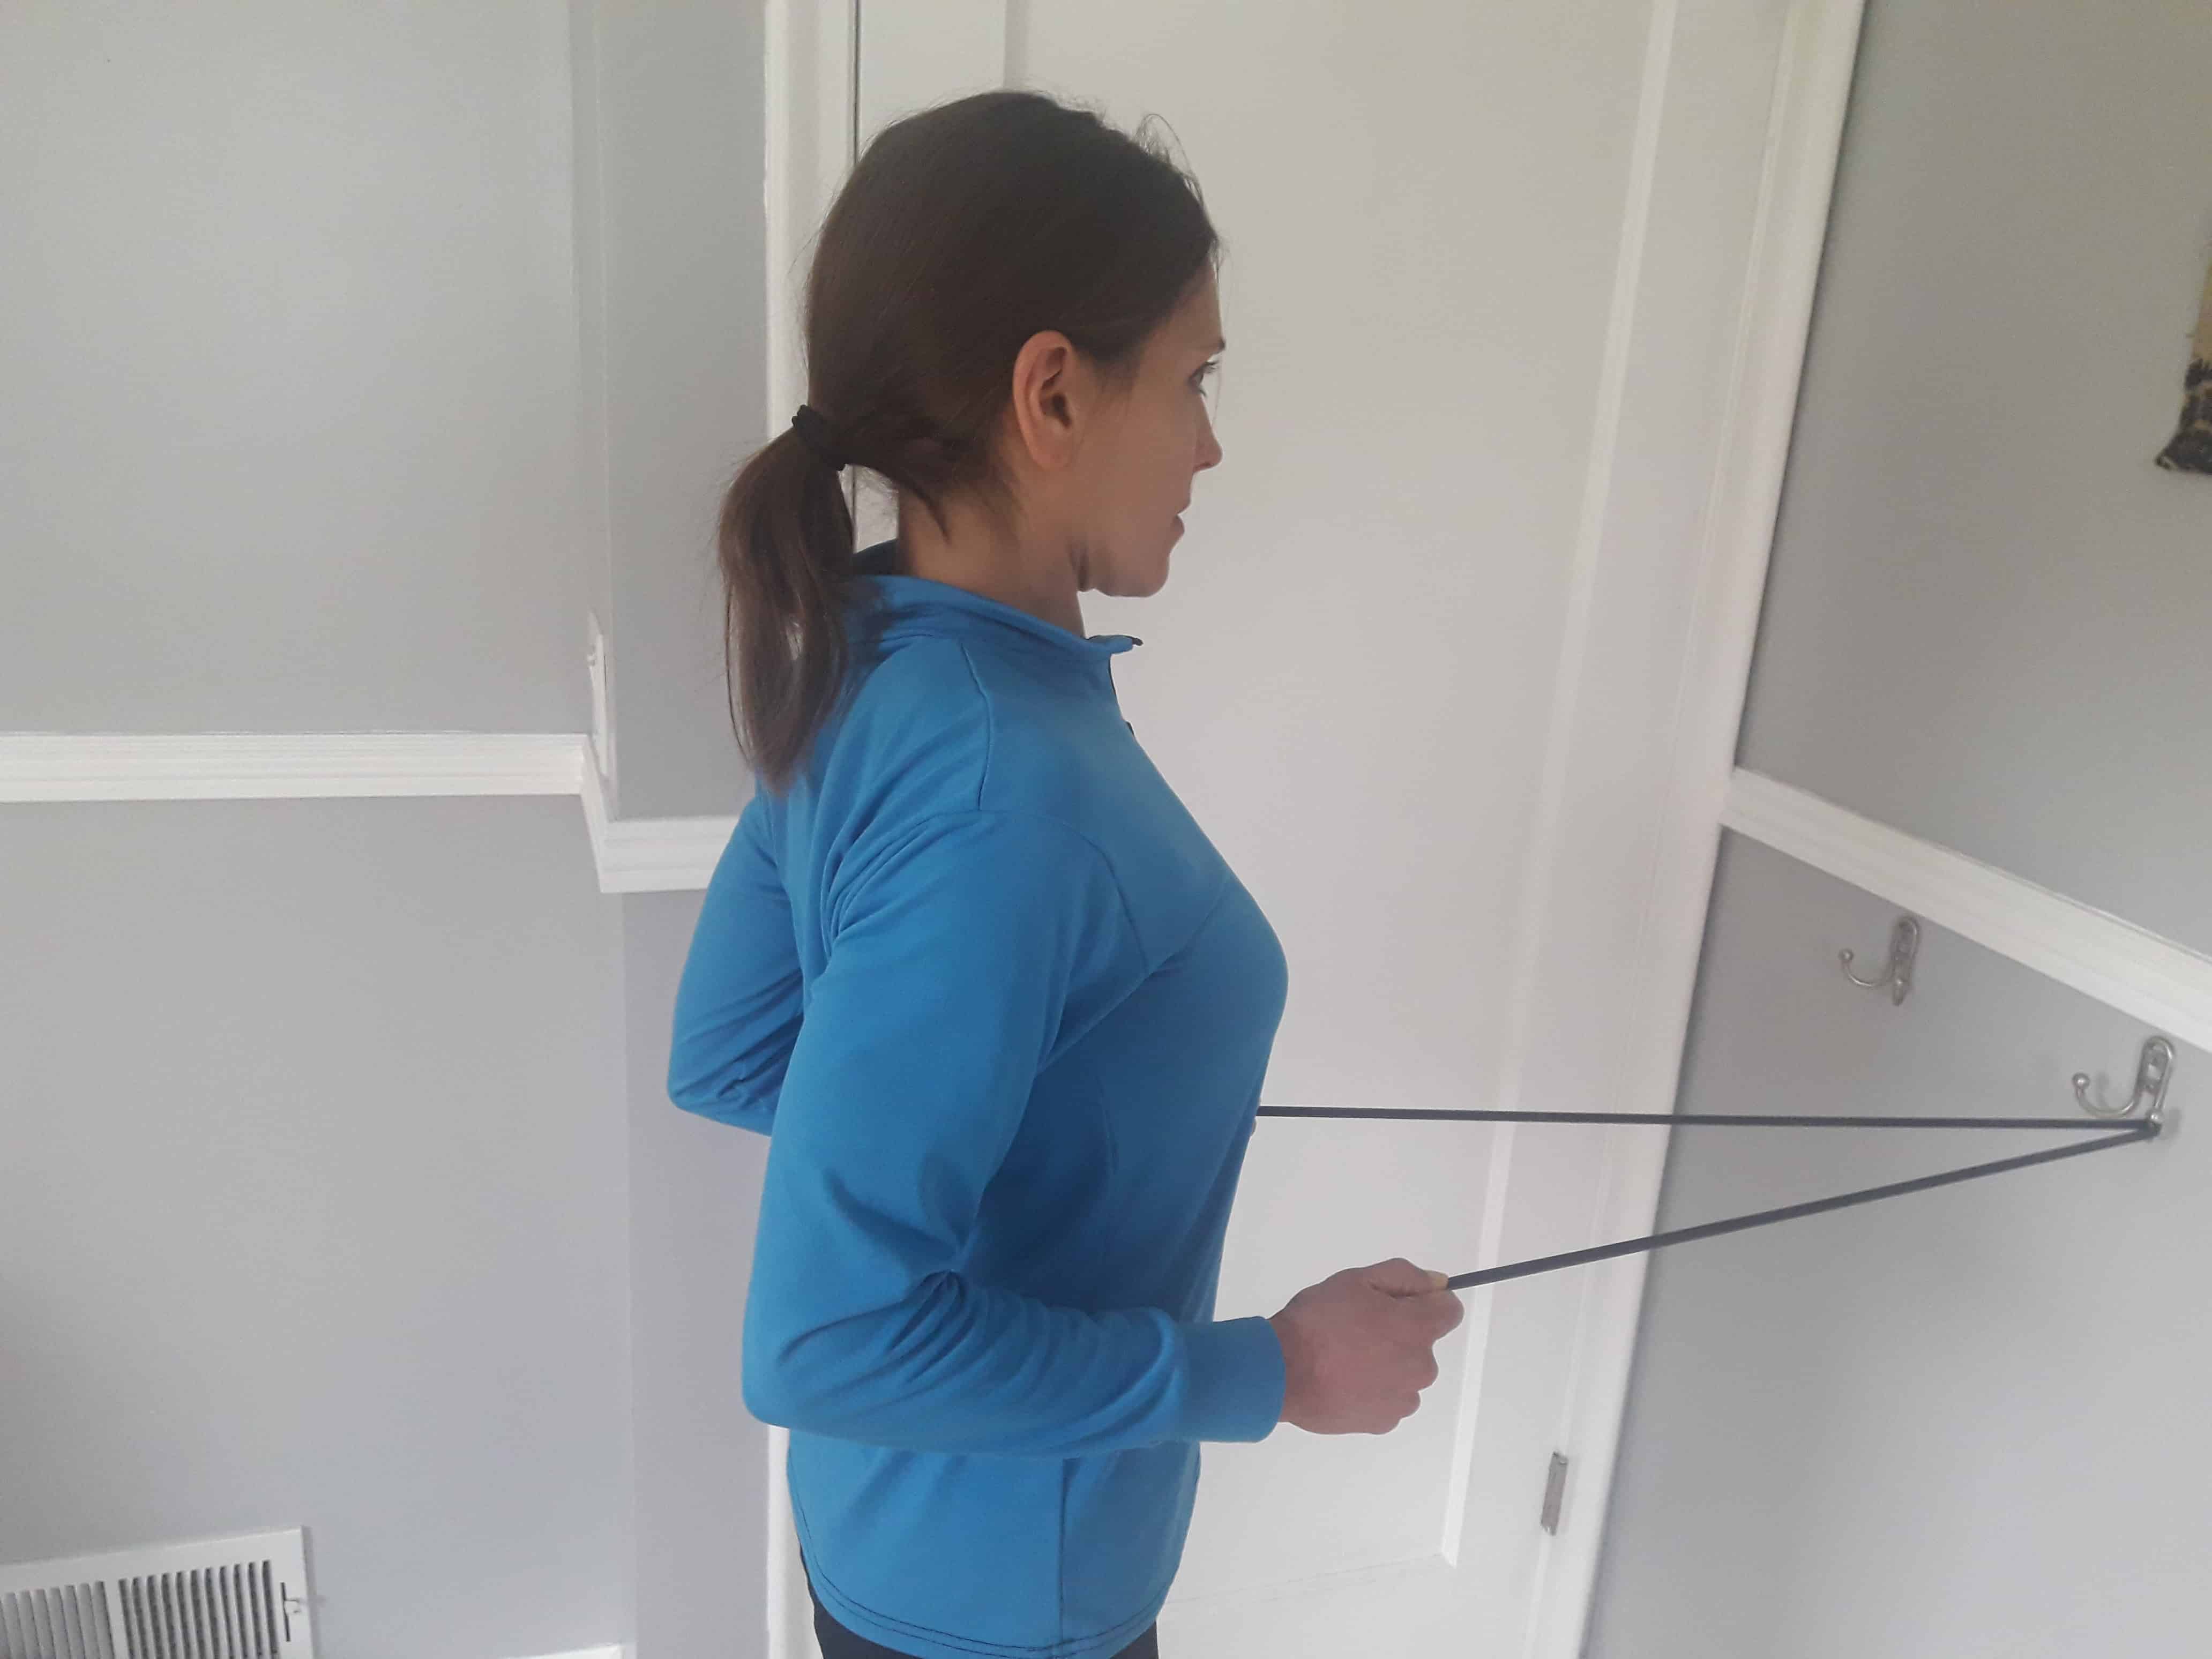
Perform a rowing motion by pulling the arms back, pinching the shoulder blades together and sticking the chest out. This exercise combines thoracic (upper back) extension, retraction of the shoulder blades and arm extension.
Common errors are to not engage the scapular stabilizers and move only the arms. This will cause the shoulder blades to tilt forward and the neck to extend which is the opposite of what we want to accomplish.
Perform 10-20 repetitions of this exercise, holding 5-10 seconds each. As this becomes easy, progress to a more challenging band.
Lower Extremity Strength
Lower extremity weakness causes substantial functional loss as we age. Inability to stand from a seated position, go up and down stairs and safely lift an object from the floor are all common problems people encounter due to weakness as they age. Lower extremity weakness can also lead to falls.
The most common lower extremity strength deficits that limit function and lead to injury involve weak hip musculature. These muscles are strengthened with trunk exercises, but a few isolated hip strengthening exercises are also beneficial.
Another common movement impairment is the inability to squat correctly. An overhead squat test (see video) can provide a tremendous amount of information about mobility and strength. A proper squat requires normal mobility at the ankles, knees, hips and spine. It also requires adequate strength and motor control throughout the trunk and lower extremity to provide stability to all of these segments simultaneously.
Many people will have deficits in mobility that prevent normal squatting. This overhead squat test video demonstrates a simple self assessment of ankle mobility. Knee and hip mobility can be assessed by lying on your back and bringing both knees to the chest. Normal mobility for the hips is for the thighs to approximate the abdomen. Normal mobility for the knees is for the calves to approximate the back of the thighs.
If you lack normal mobility at the hips, knees or ankles, perform the squatting exercises in a pain-free modified range of motion and consider having these issues evaluated by a physical therapist.
Modified Air Squats
I encourage everyone to practice air squats with proper form (See video). This is a fundamental functional movement. Yet most people lack either the mobility, strength and/or motor control to do it correctly. This predisposes you for injury and functional loss as you age.
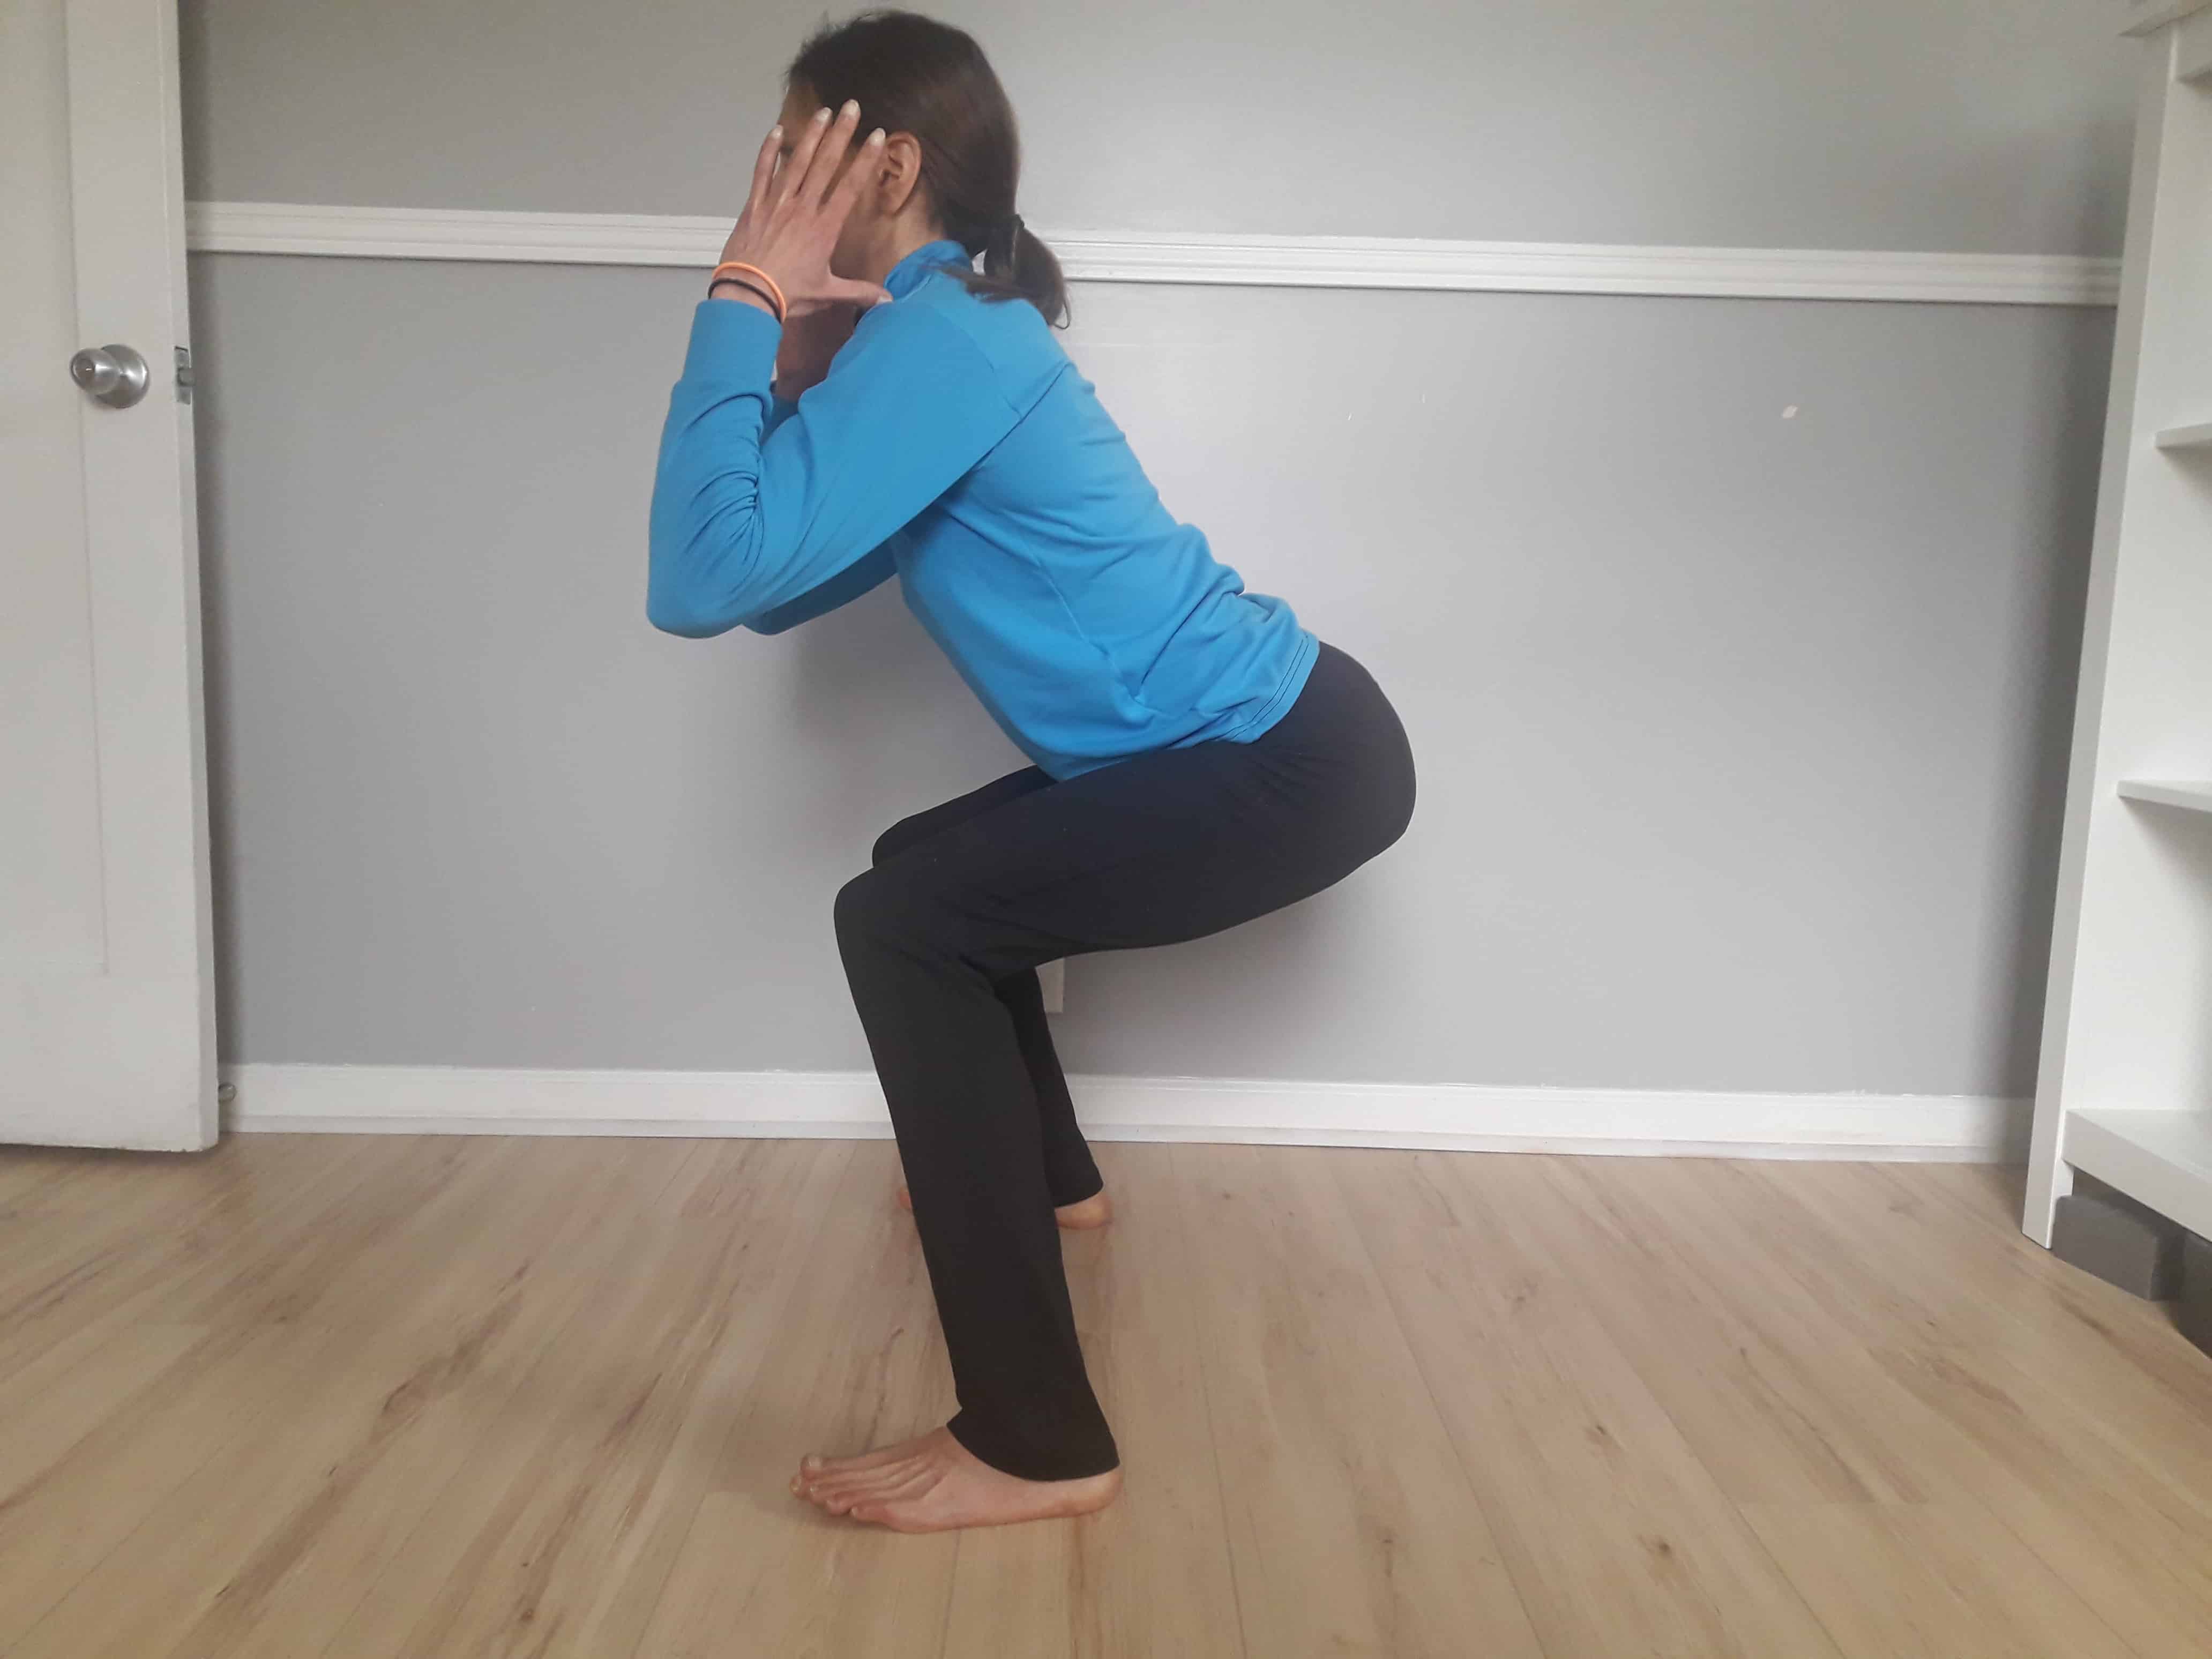
Perform air squats standing with feet shoulder width or slightly wider and toes straight ahead. Drop your hips down and back keeping the heels on the floor. Keep the chest up, maintaining the position of the spine. Weight should be equally distributed and the knees should remain in alignment with the feet. Finish the movement by fully extending the hips and knees.
A “proper” air squat is for the hips to descend lower than the knees and to have the arms extended in front of the body. I recommend two modifications. First, squat only as far down as able without experiencing any pain or losing form. Second, bend the elbows resting the thumbs on the front of the shoulders to make proper weight shifting easier.
A common error is to not shift the weight back. This forces the the knees over the toes, putting strain on the front of the knees. Another common error is to bend forward at the waist, rather than bending the hips and knees.
Side Lying Hip Abduction
Hip abduction is the movement that occurs when standing on one leg and lifting the leg out to the side. Weakness of hip abductors is extremely common.
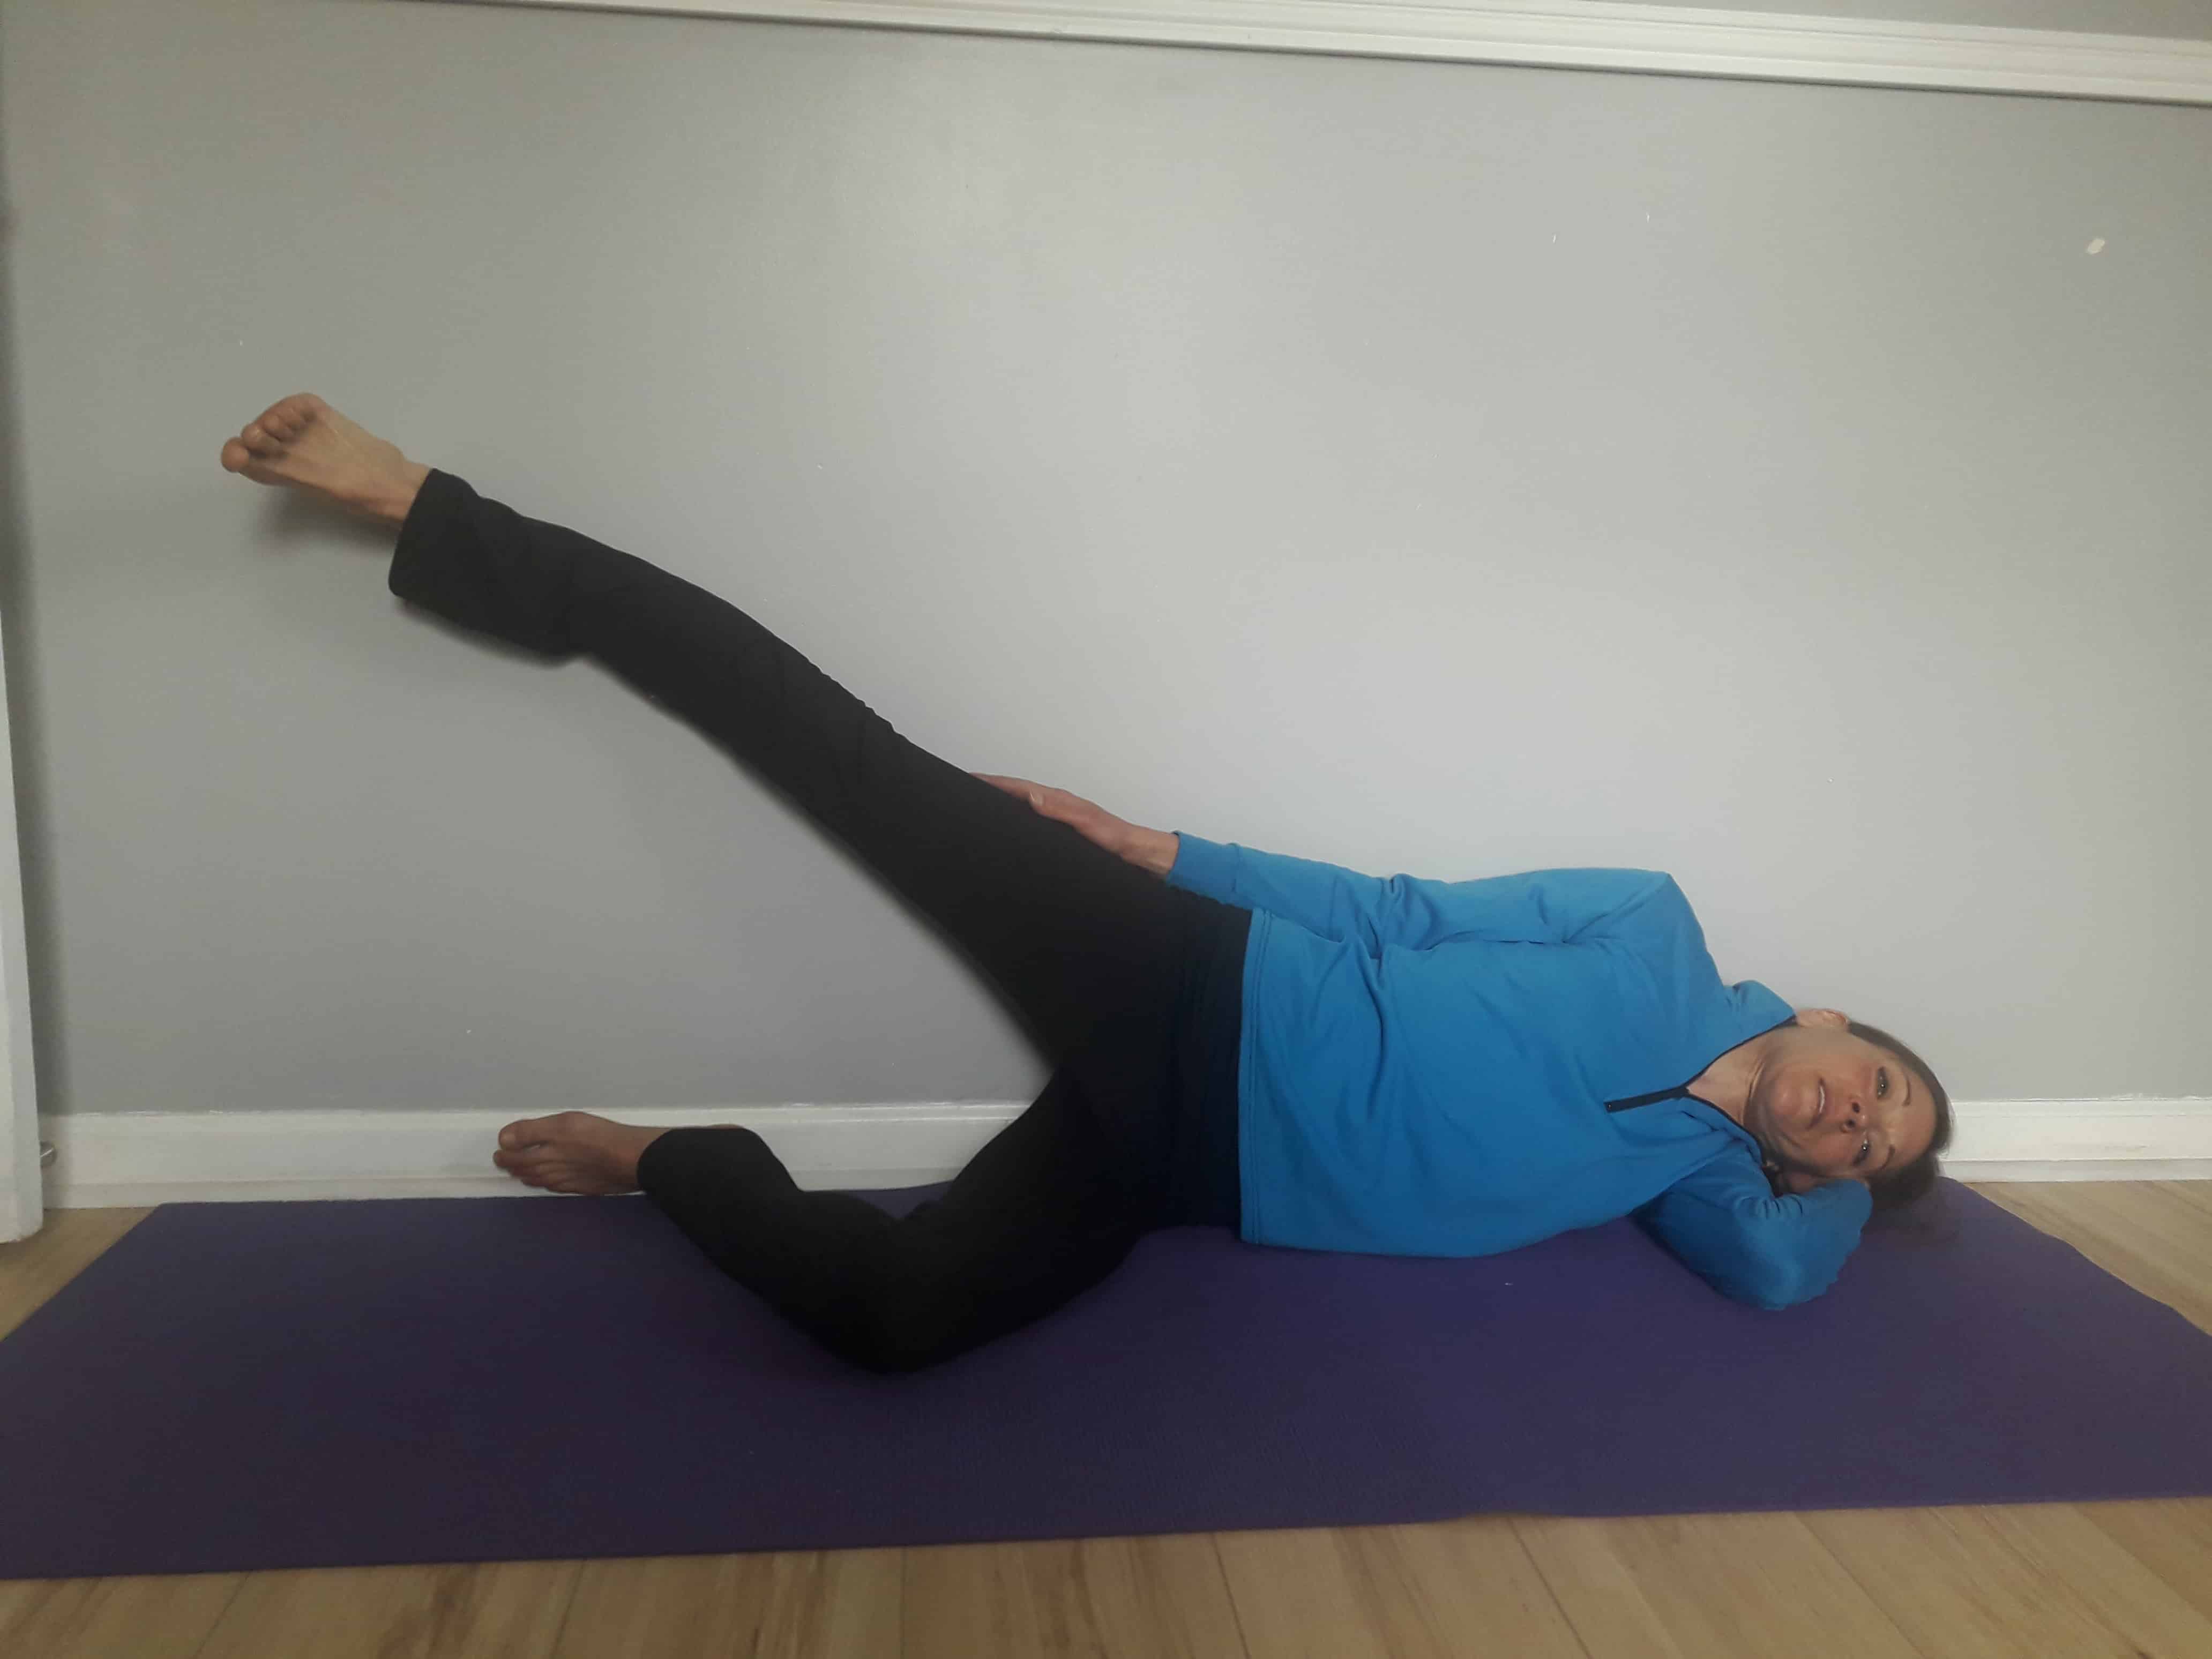
While lifting the leg out to the side is not very important functionally, the hip abductors play a vital role in providing stability when you walk or run. They prevent the hip from adducting, the opposite of abducting, when you are on one leg. Weak hip abductors lead to a Trendelenburg gait (see video). This is associated with a number of hip and knee problems.
Side lying hip abduction is done to strengthen the hip abductors. To perform this exercise, lie on one side with your back flat against a wall. Slide the heel of the top leg up the wall while keeping the leg straight.
Using the wall does not allow you to roll the pelvis back and it provides feedback to prevent the leg from drifting forward. Both of these are common compensations. If you don’t have a place to do the exercises against a wall, imagine there is one there to maintain proper form.
Start with ten repetitions if you are able without losing form. As this becomes easy increase repetitions and/or add a cuff weight around the ankle.
Clamshells
Weakness of the hip external rotators is another common problem. These muscles are also important to stabilize the hip in single leg stance.
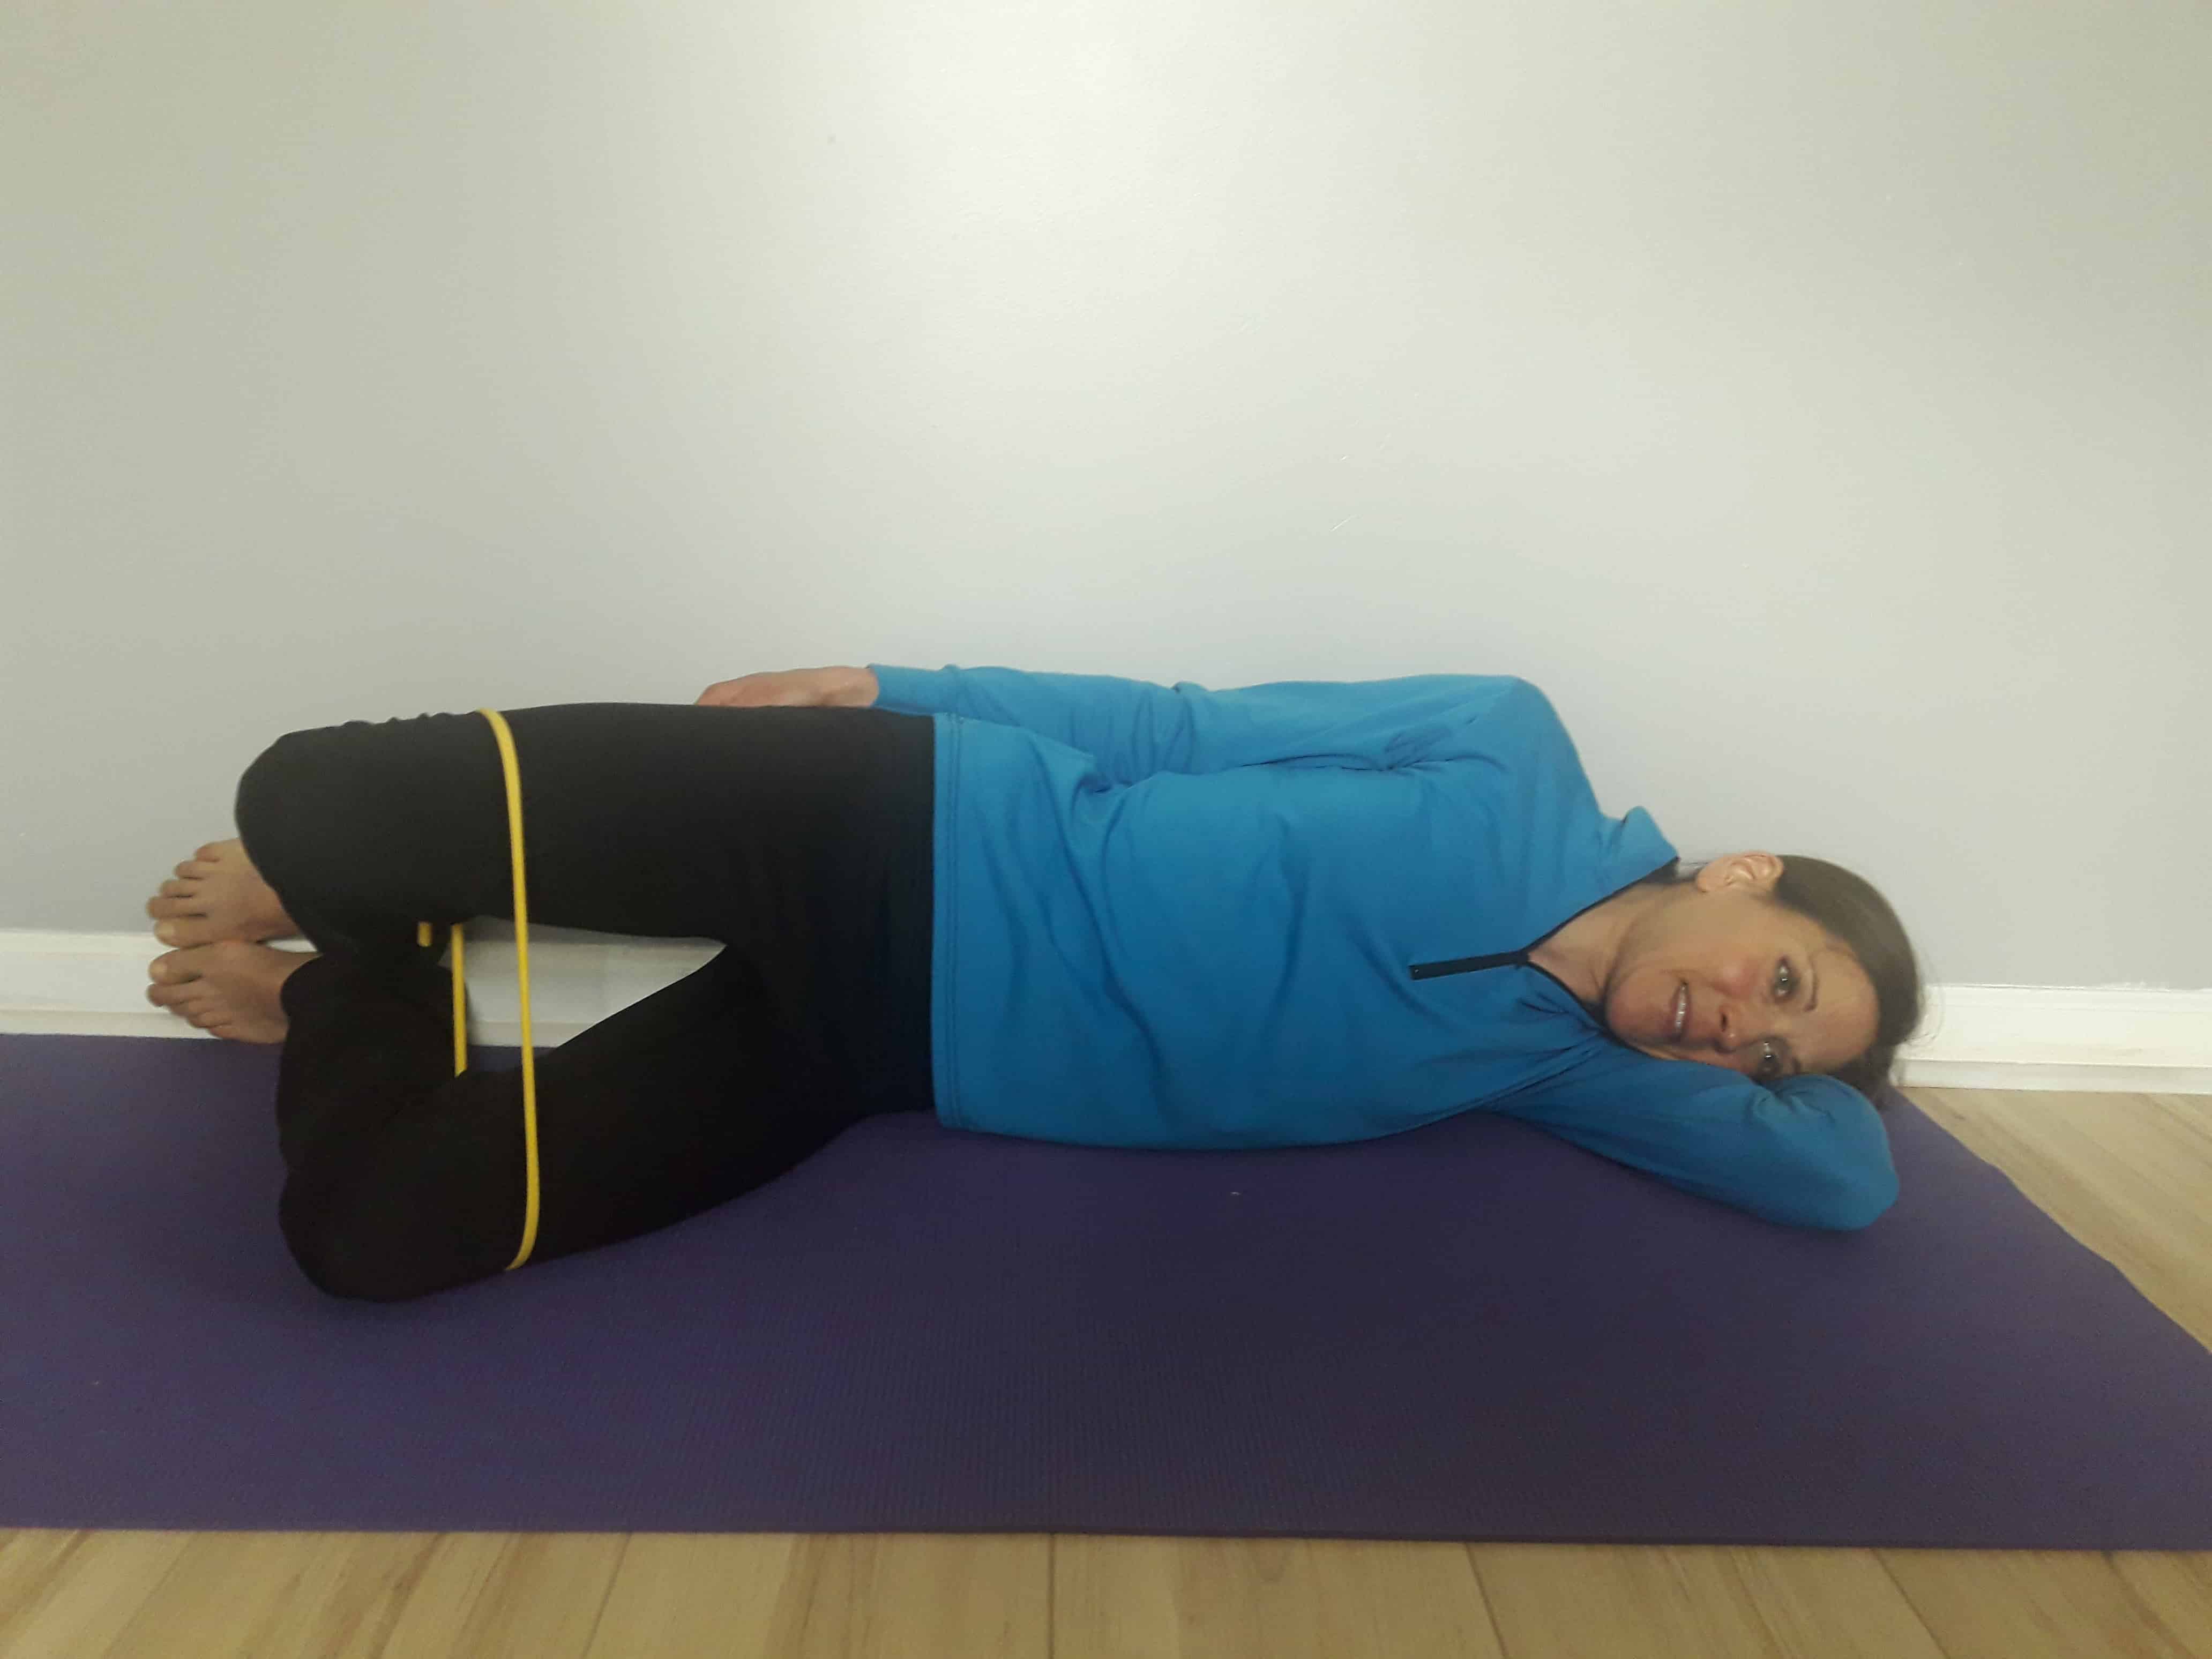
Clamshells are a great exercise to isolate the hip external rotators. Perform this exercise by lying on your side with the legs flexed at the hips and knees, stacked on one another.
Keep the feet in contact with one another while opening the knees as wide as possible. This can also be done lying with your back against a wall to help stabilize the pelvis. If you don’t have open wall space to do this, again be aware not to allow the pelvis to rotate backward.
Start with ten repetitions, increasing as able without losing form. Once you can perform twenty repetitions easily, add resistance by tying a resistance band around the knees or putting a cuff weight around the top knee.
Hip Extension
Hip extension weakness is another common impairment. Hip extension is moving the leg backwards in relation to the body.
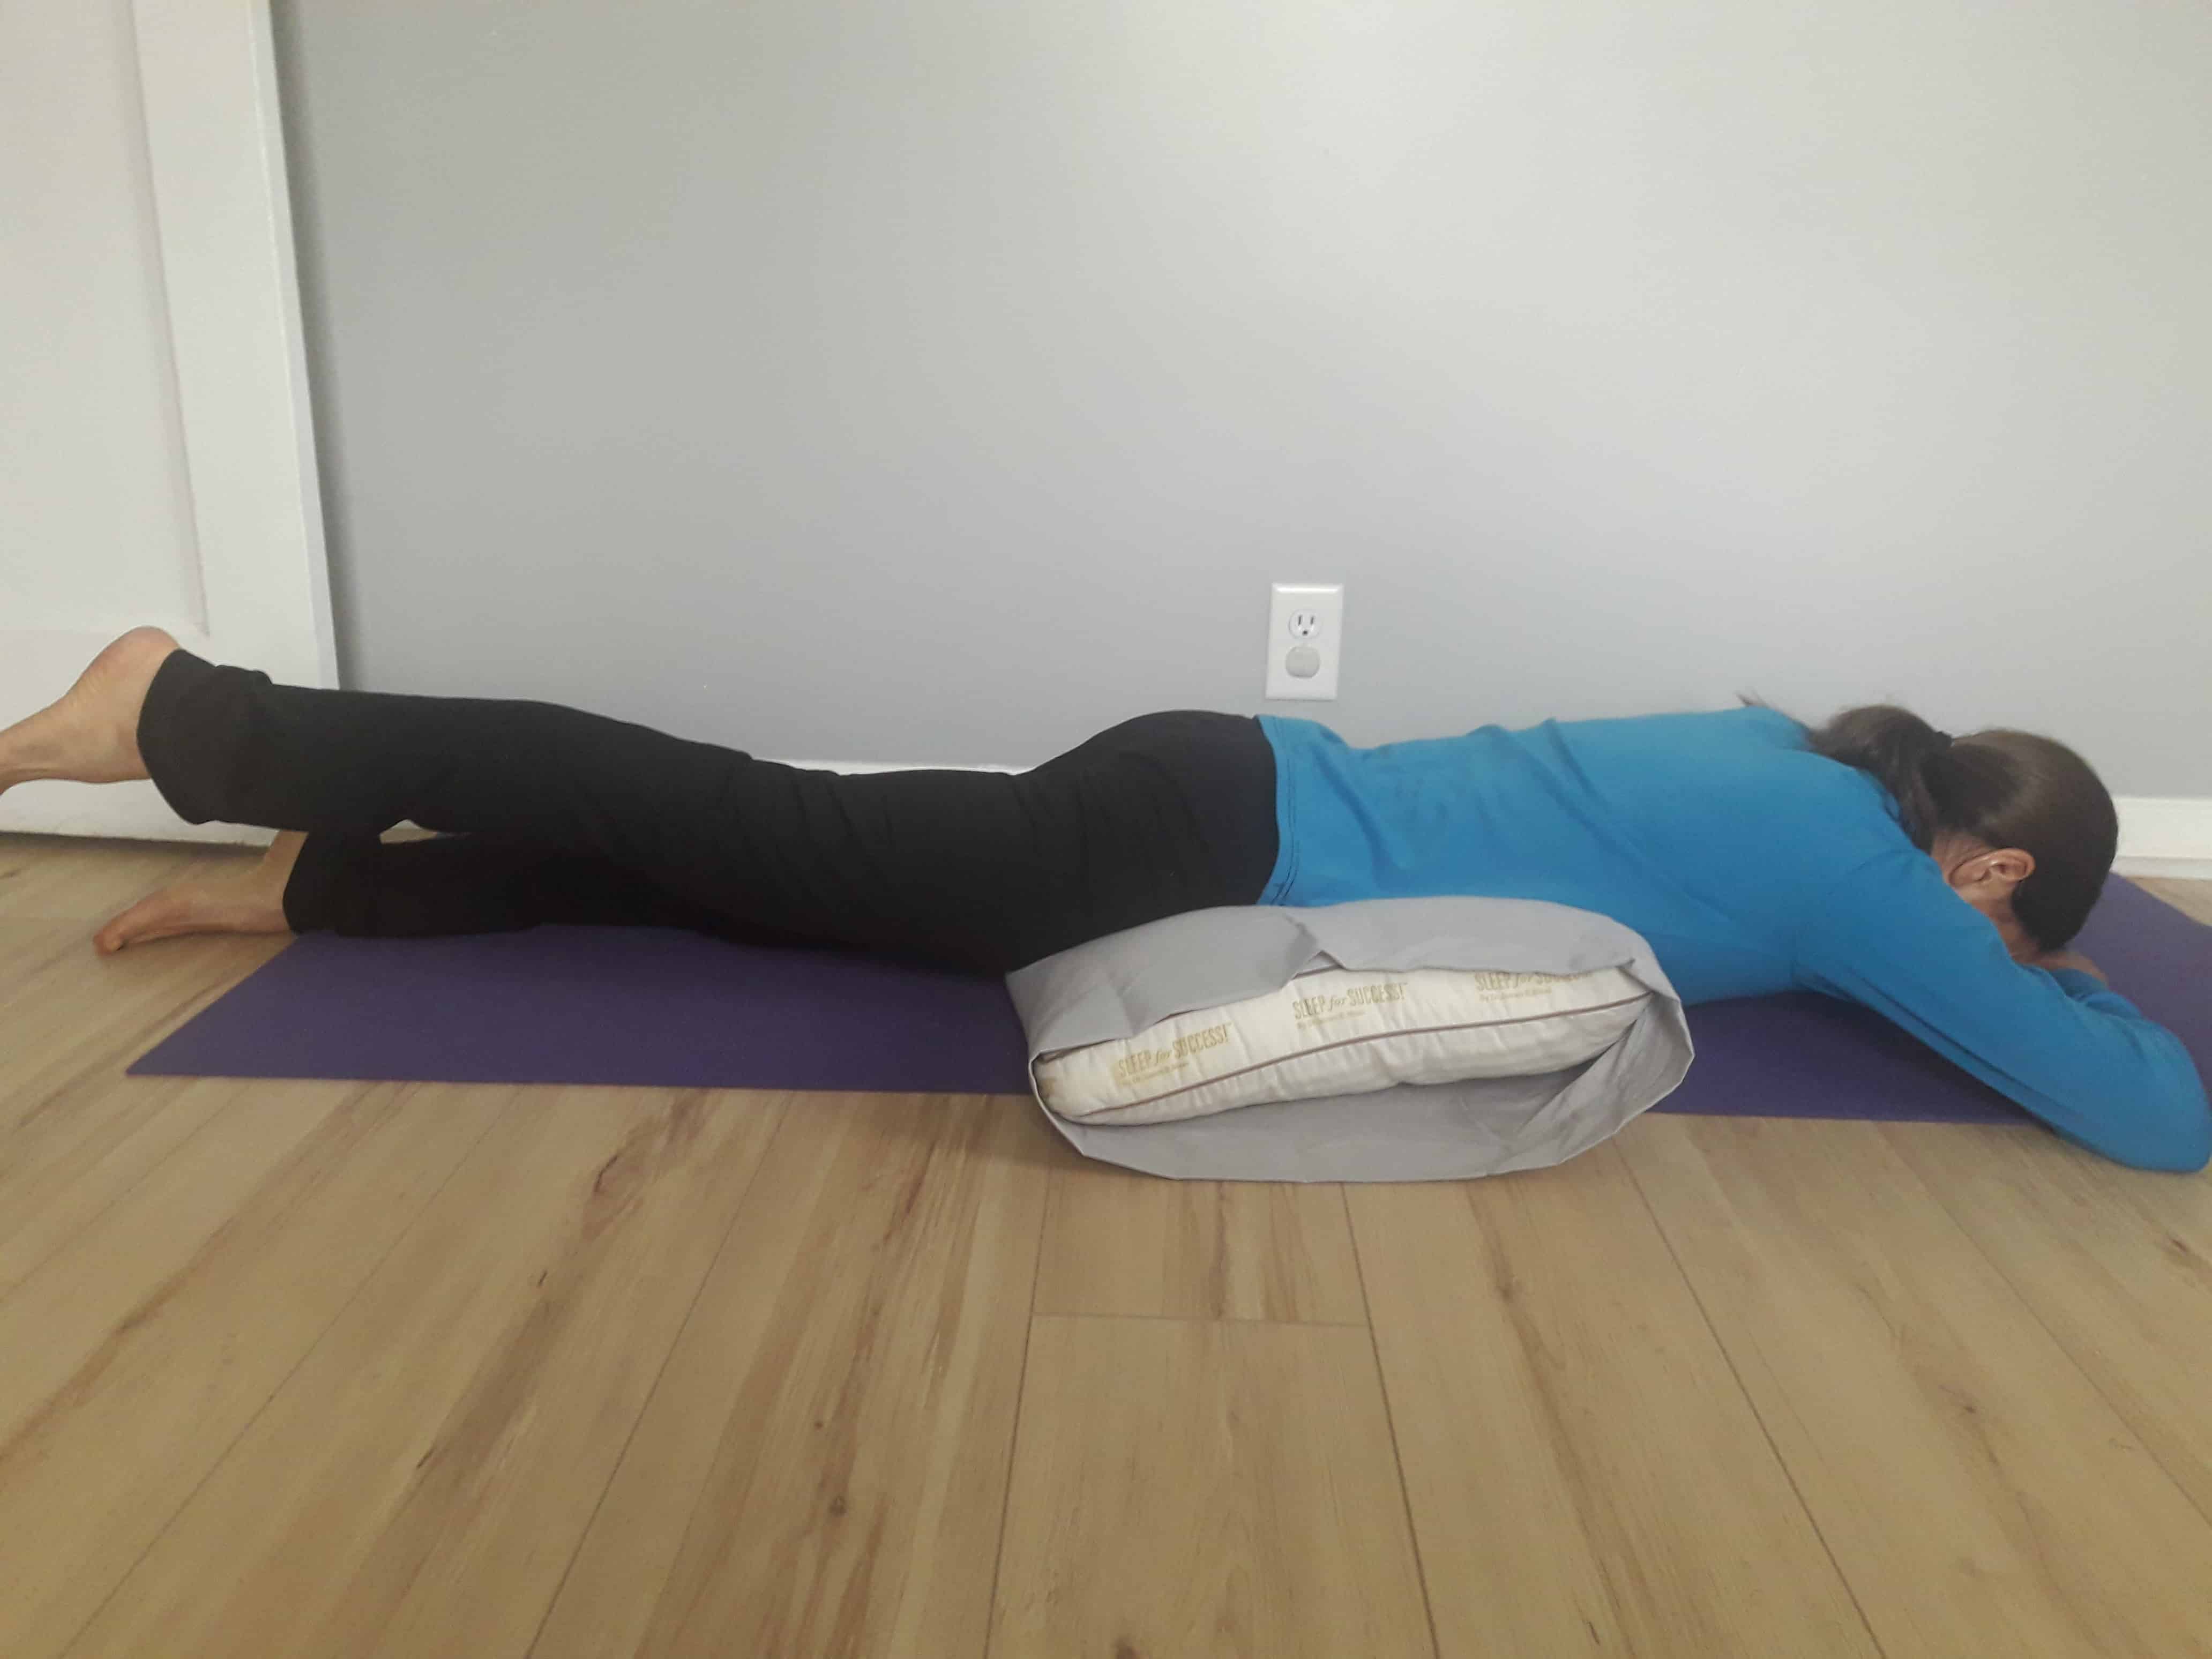
Normal hip extension is only about ten to twenty degrees beyond the plane of the body and many people lack normal mobility. Do not force this motion. Doing so will cause compensation placing stress on the low back.
Perform this exercise lying face down with a pillow under the abdomen. This allows you to start in a little bit of hip flexion (the opposite of extension). Lift the leg from the floor as high as you’re able without the pelvis lifting or rotating.
Start with the weight of the leg until you can easily complete twenty repetitions. Then increase the difficulty of this exercise by adding a cuff weight at the ankle.
Practical Application
In total, I’ve identified thirteen key strengthening movements to keep you strong and healthy into your retirement. That is in addition to the seven mobility exercises I shared in a previous post.
Knowledge is power. However, too much knowledge without a system to implement it can overwhelm and lead to inaction. It’s important to have a system in place to utilize this knowledge.
How do you do these exercises without them becoming overwhelming? Here is my recommendation.
Spend some time with each of the exercises. Once you understand what you’re trying to accomplish with each exercise and can perform them correctly, incorporate them into an overall fitness plan.
My Routine
This will look different for each of us, so I’ll share my personal fitness routine as an example. These exercises make up the foundation of the routine I’ve developed to prevent injury and keep me active.
I’m certainly not perfect and you don’t have to be either. Rarely do I have a week that looks like this idealized program. But having some structure in place helps keep me on track.
Mobility/ Upper Body Posture
The only time I typically sit is when writing or driving. When doing these activities, I typically try to incorporate at least one of the following exercises (shown here) that can be done anywhere every hour:
- Bilateral shoulder external rotation with breathing
- Scapula retractions/depression
If I’m writing at my home, I’ll supplement these exercises with one or more of the following:
- Lying on a foam roller for 2-3 minutes
- Resisted bilateral shoulder external rotation with tubing
- Tubing resisted rows
- Ts and Ys on a theraball
Core Strength/Flexibility
It is wise to spend some time familiarizing yourself with performing the core and hip strengthening exercises described above as well as the lower extremity flexibility exercises described in this post.
If you have ever done a yoga or pilates routine, these exact exercises or variations of them will look familiar. There is a lot of similarity between yoga and pilates. Both are great for improving core strength and lower extremity flexibility that most people lack.
I find pilates to be a bit better for those needing to focus more on strength. I personally struggle more with flexibility so I prefer yoga. I rotate between a number of yoga routines that I try to perform two days each week.
Strength/Endurance
I typically combine my strength and cardiovascular workouts, performing high intensity interval training (HIIT) workouts. Air squats are a staple of my workouts along with other total body strengthening exercises like push-ups, pull-ups, two handed kettlebell swings and burpees. When I was working, I would typically do a different routine every Monday, Wednesday and Friday.
Now that I’m living a far more active lifestyle that has me in the mountains three to five days every week, that would be overkill. I still try to do one or two HIIT workouts each week to maintain strength in key muscle groups.
HIIT routines enable those who can tolerate high intensity exercise to simultaneously get strength and cardiovascular benefits without spending a lot of time in the gym. This is accomplished by using different muscle groups in high intensity exercise for short intervals alternating with periods of recovery.
My HIIT routines typically take about twenty minutes. I follow them up with mobility and flexibility exercises to cool down. This gives an excellent total body workout in about thirty minutes start to finish.
Invest the time to understand the common areas of weakness and how to address them. Then incorporate them into a program that works for you. This investment will pay dividends to help keep you active, mobile and strong as you age.
* * *
Valuable Resources
- The Best Retirement Calculators can help you perform detailed retirement simulations including modeling withdrawal strategies, federal and state income taxes, healthcare expenses, and more. Can I Retire Yet? partners with two of the best.
- New Retirement: Web Based High Fidelity Modeling Tool
- Pralana Gold: Microsoft Excel Based High Fidelity Modeling Tool
- Free Travel or Cash Back with credit card rewards and sign up bonuses.
- Monitor Your Investment Portfolio
- Sign up for a free Empower account to gain access to track your asset allocation, investment performance, individual account balances, net worth, cash flow, and investment expenses.
- Our Books
- Choose FI: Your Blueprint to Financial Independence
- Can I Retire Yet: How To Make the Biggest Financial Decision of the Rest of Your Life
- Retiring Sooner: How to Accelerate Your Financial Independence
* * *
Disclosure: Can I Retire Yet? has partnered with CardRatings for our coverage of credit card products. Can I Retire Yet? and CardRatings may receive a commission from card issuers. Some or all of the card offers that appear on the website are from advertisers. Compensation may impact on how and where card products appear on the site. The site does not include all card companies or all available card offers. Other links on this site, like the Amazon, NewRetirement, Pralana, and Personal Capital links are also affiliate links. As an affiliate we earn from qualifying purchases. If you click on one of these links and buy from the affiliated company, then we receive some compensation. The income helps to keep this blog going. Affiliate links do not increase your cost, and we only use them for products or services that we're familiar with and that we feel may deliver value to you. By contrast, we have limited control over most of the display ads on this site. Though we do attempt to block objectionable content. Buyer beware.